Windows 11 Professional - Tweaks to help gaming performance
If you want that extra edge when playing games these settings and tweaks may help. Any changes that involve using the Group Policy Editor and Registry Editor will require a reboot for that change to take effect. I may update this page as time goes by, comments are open so feel free to add your comments or thoughts.


Disable any unnecessary apps running at startup
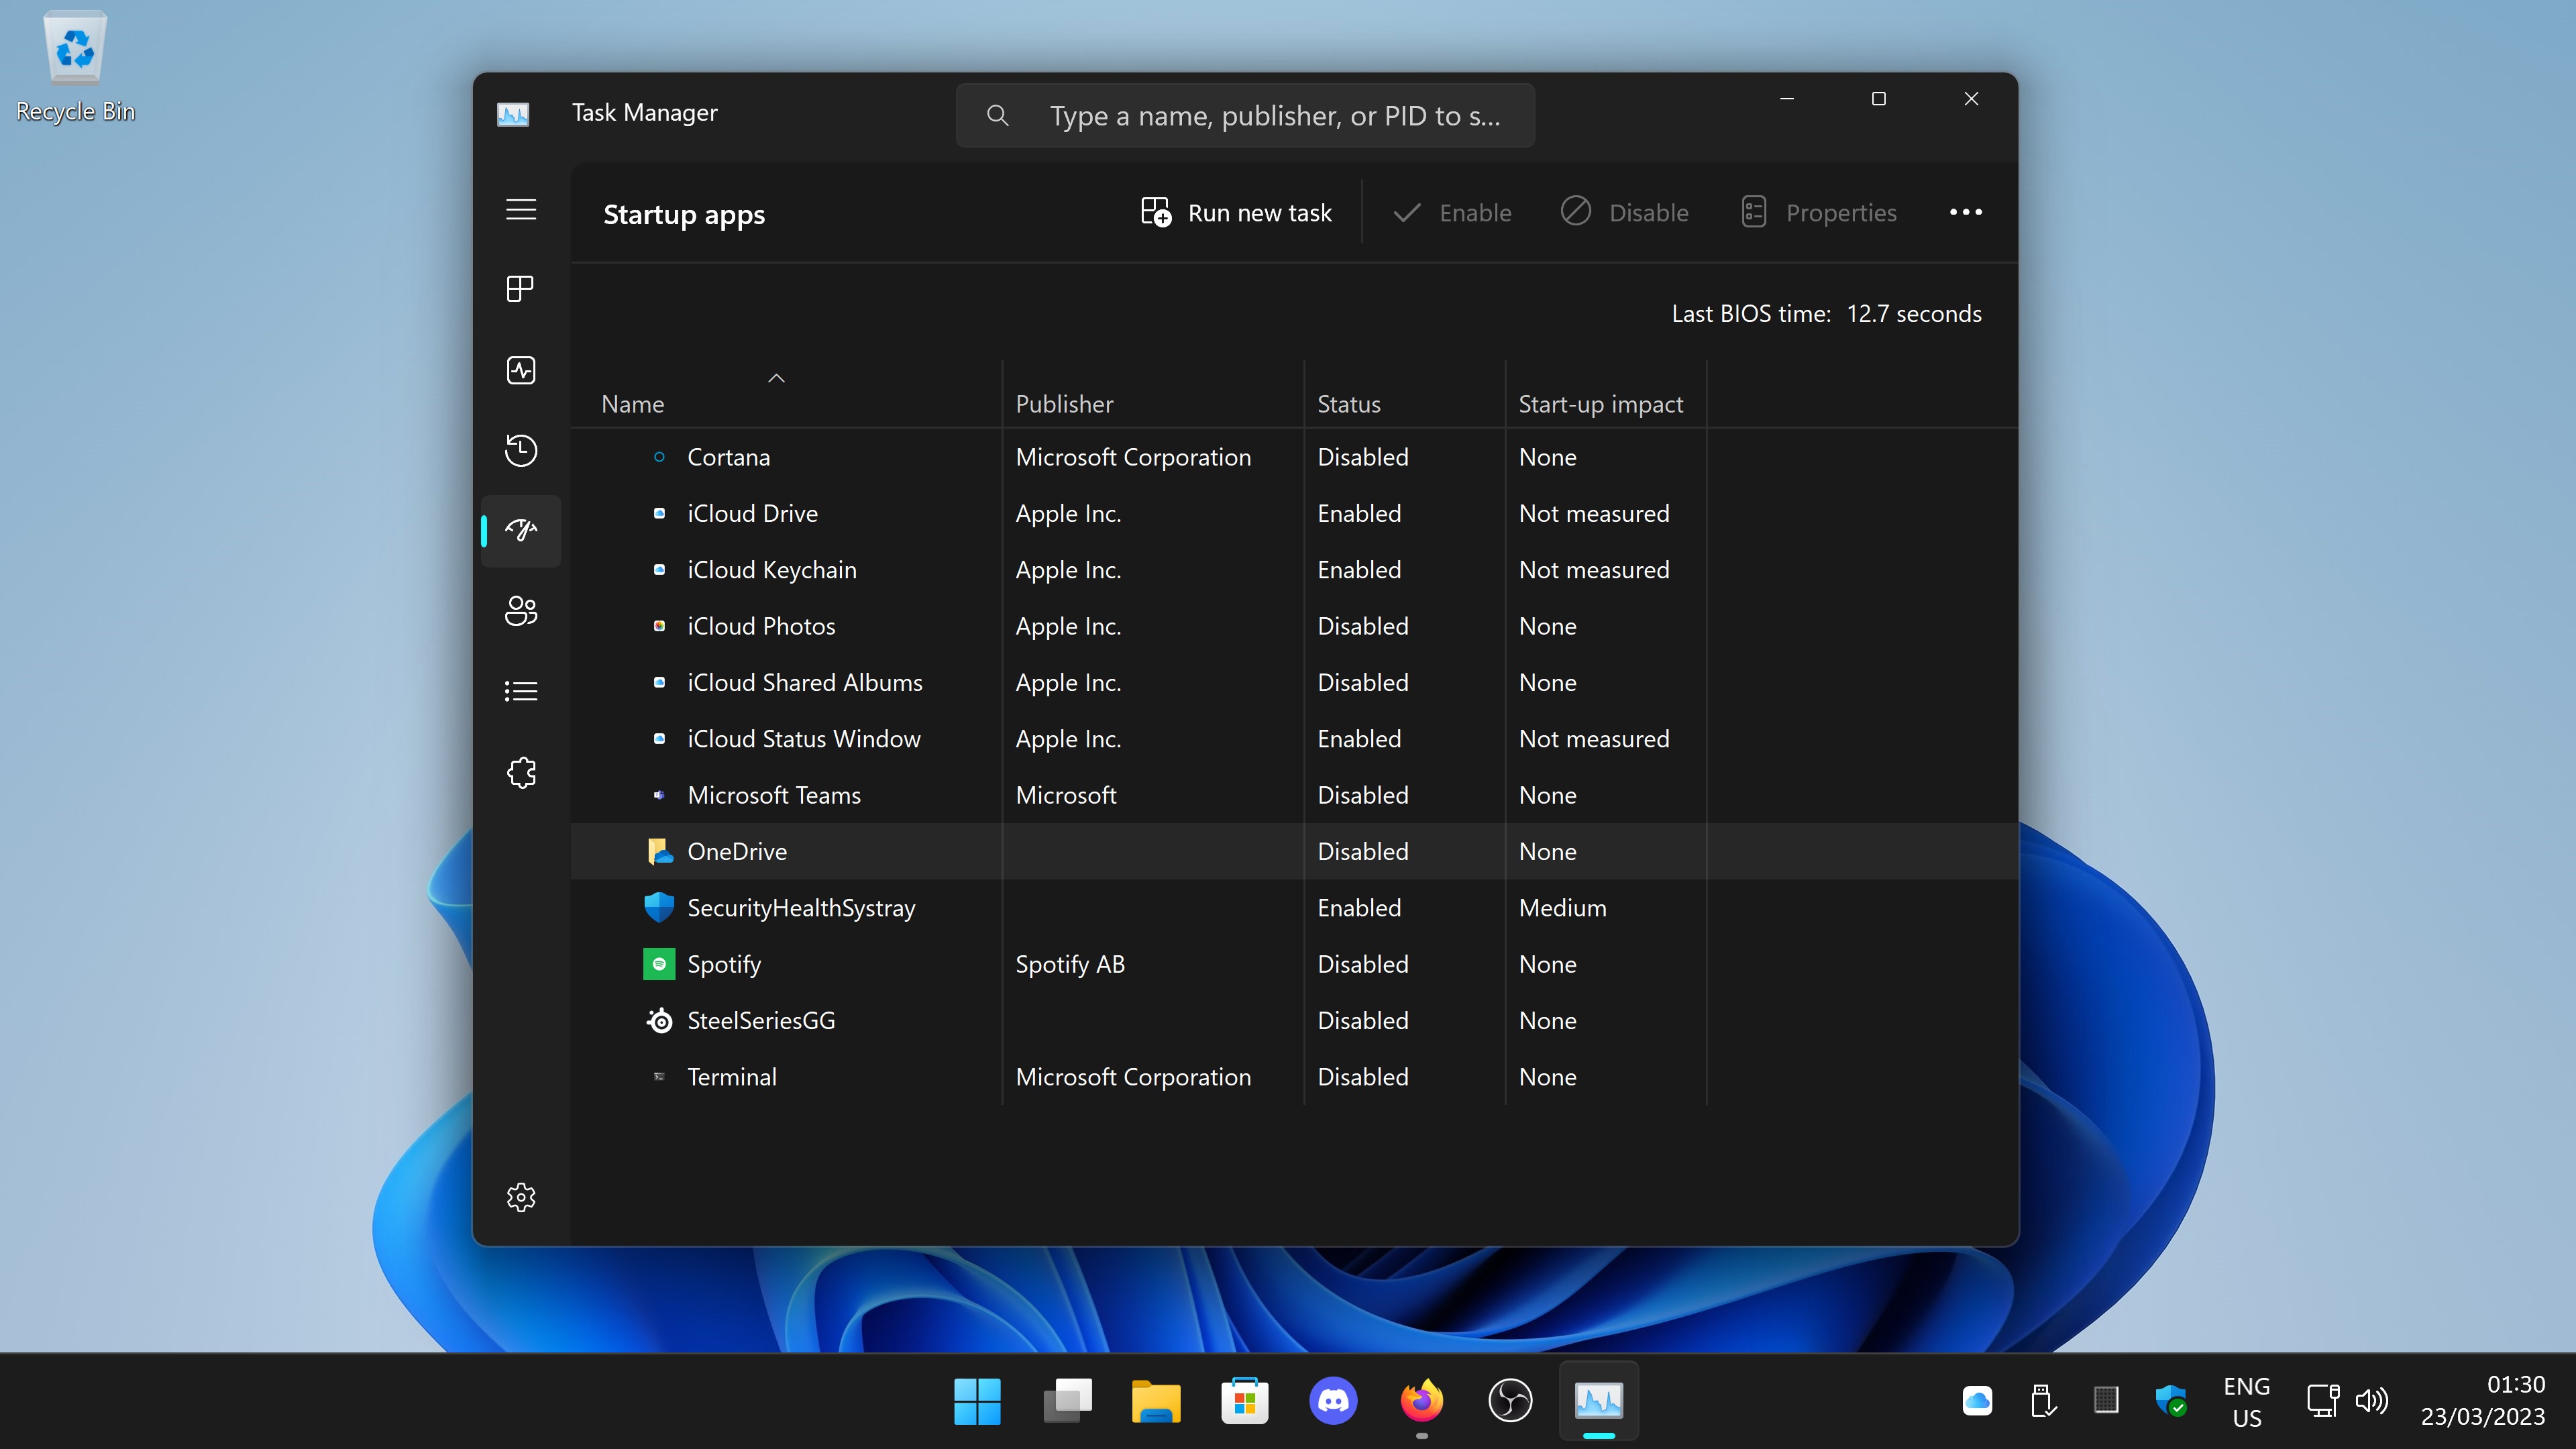
Use Task Manager or (Settings > Apps > Startup) to disable any unnecessary apps from running at start up
Task Manager
Settings > Apps > Startup
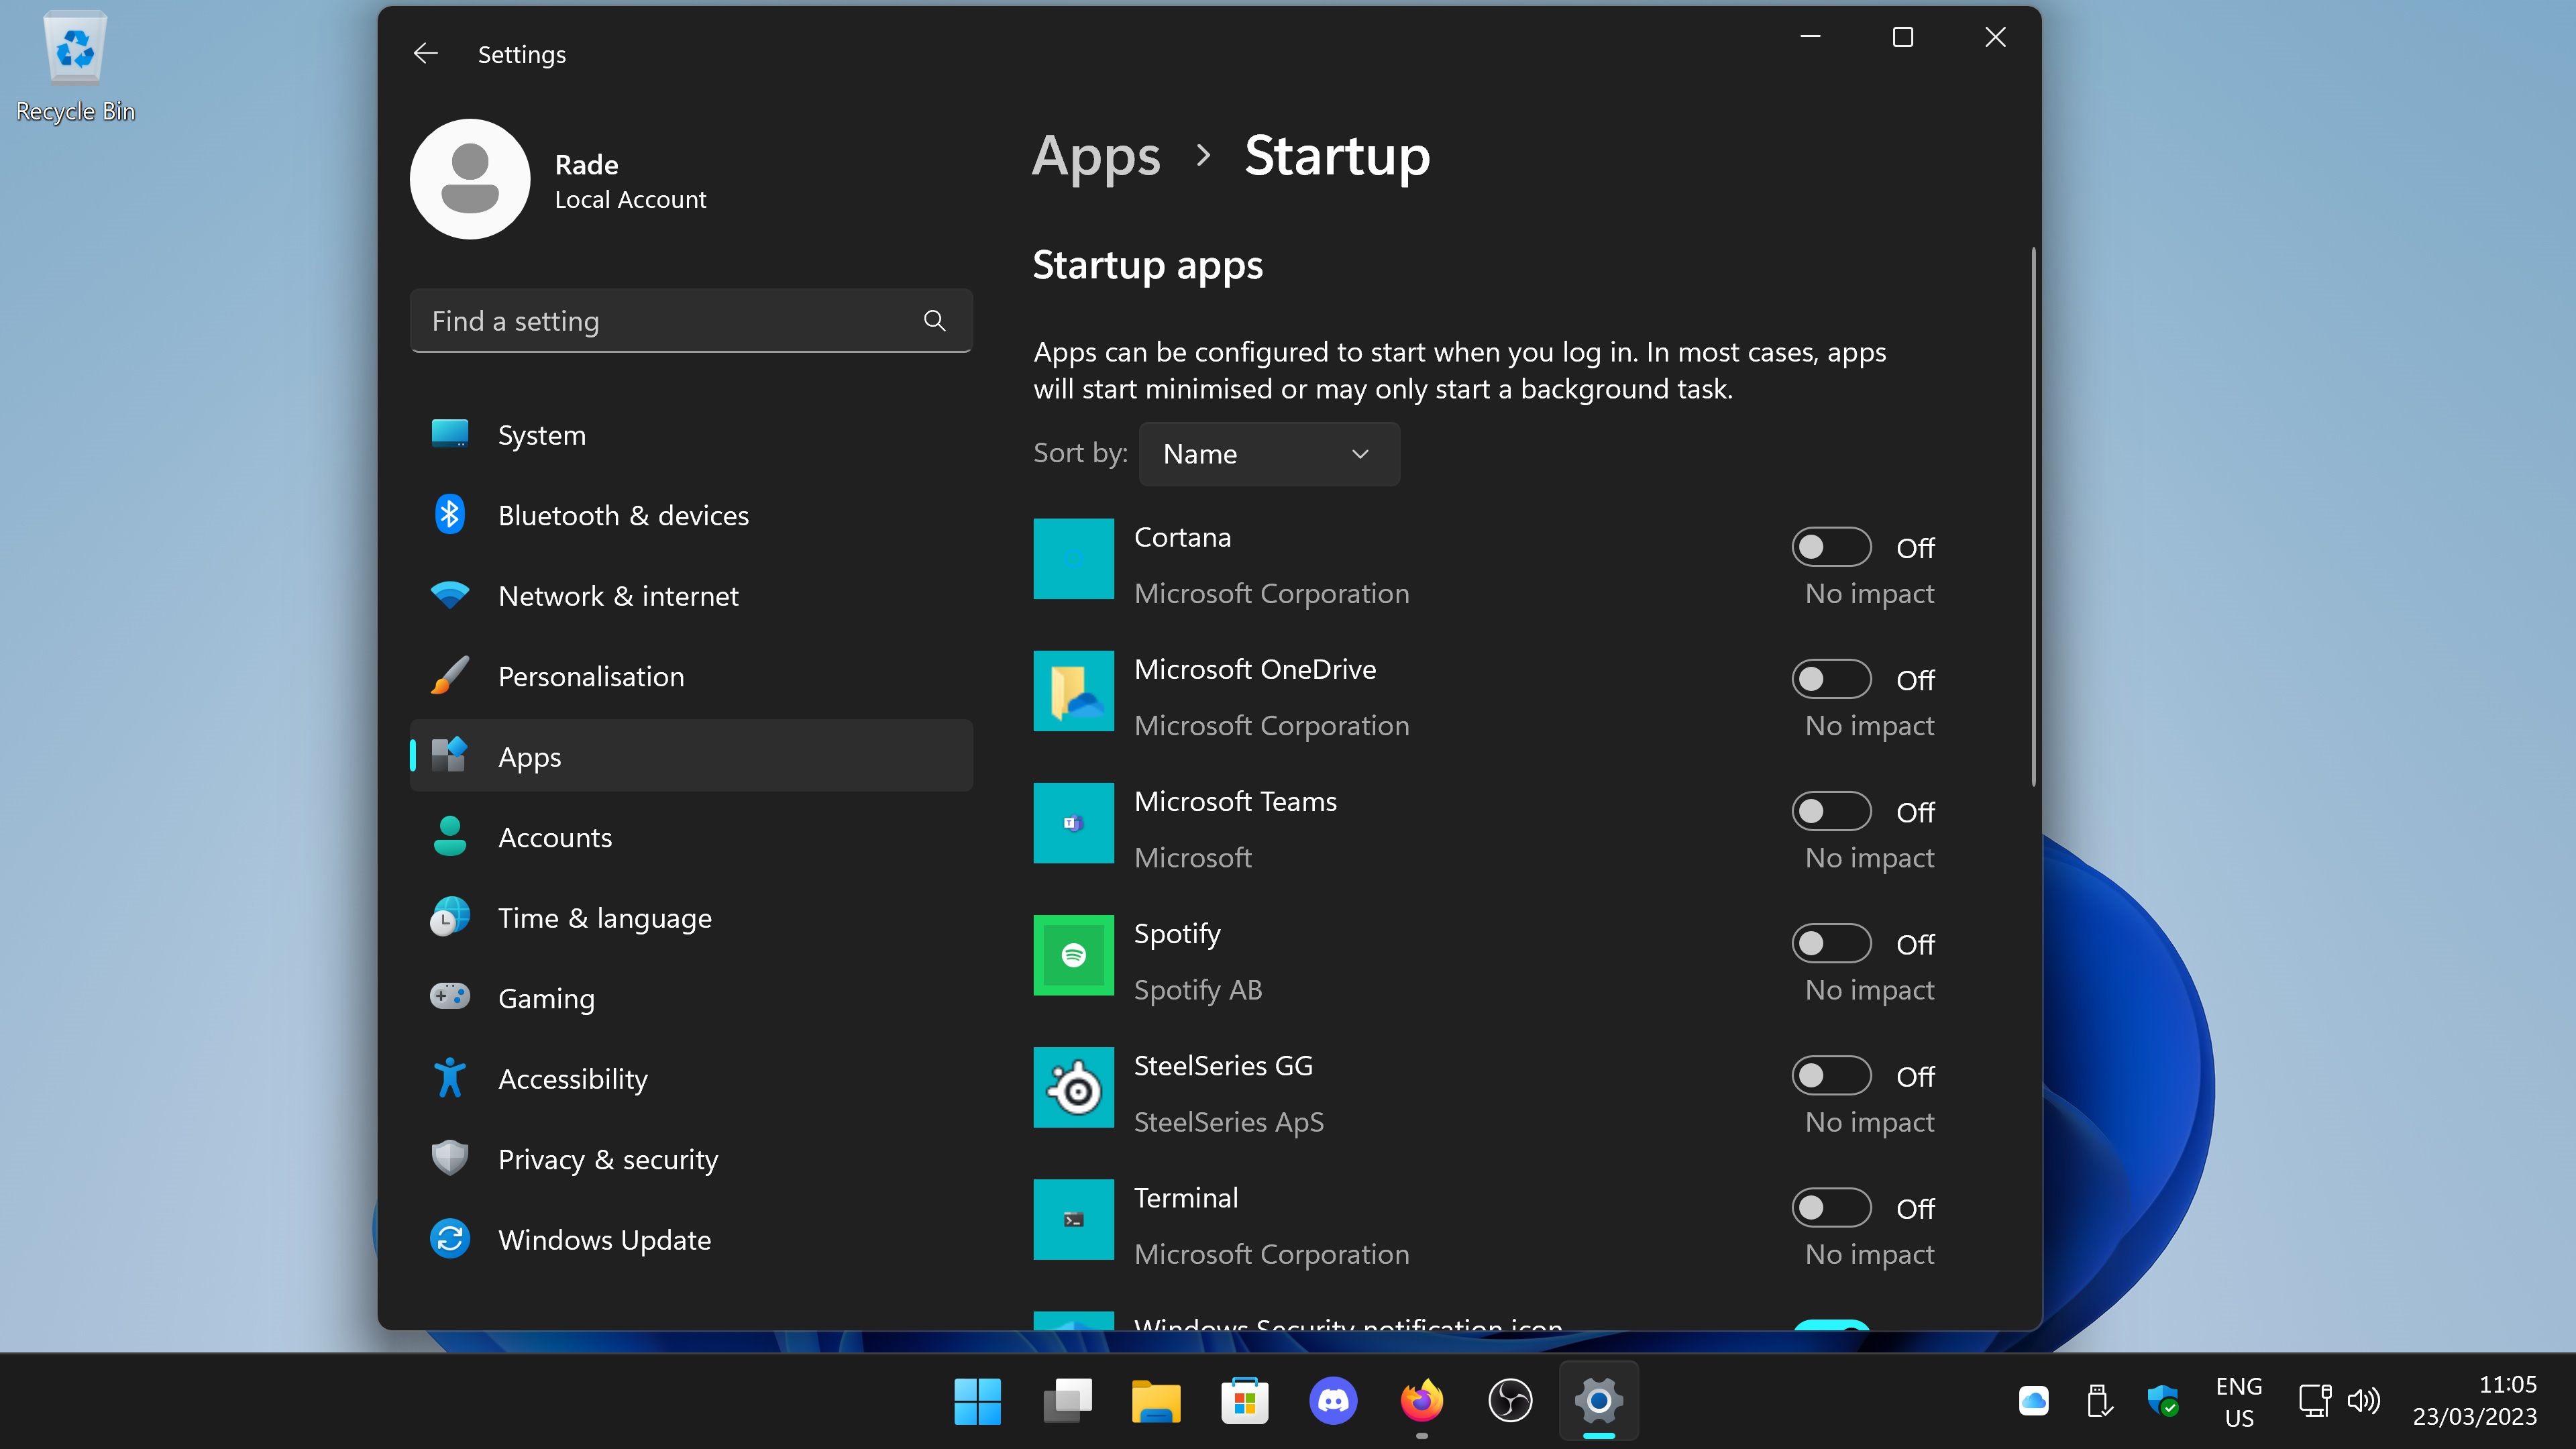
Go through your start up apps and disable anything you do not need to run. In my case I have disabled OneDrive, Microsoft Teams, SteelSeriesGG and iCloud.
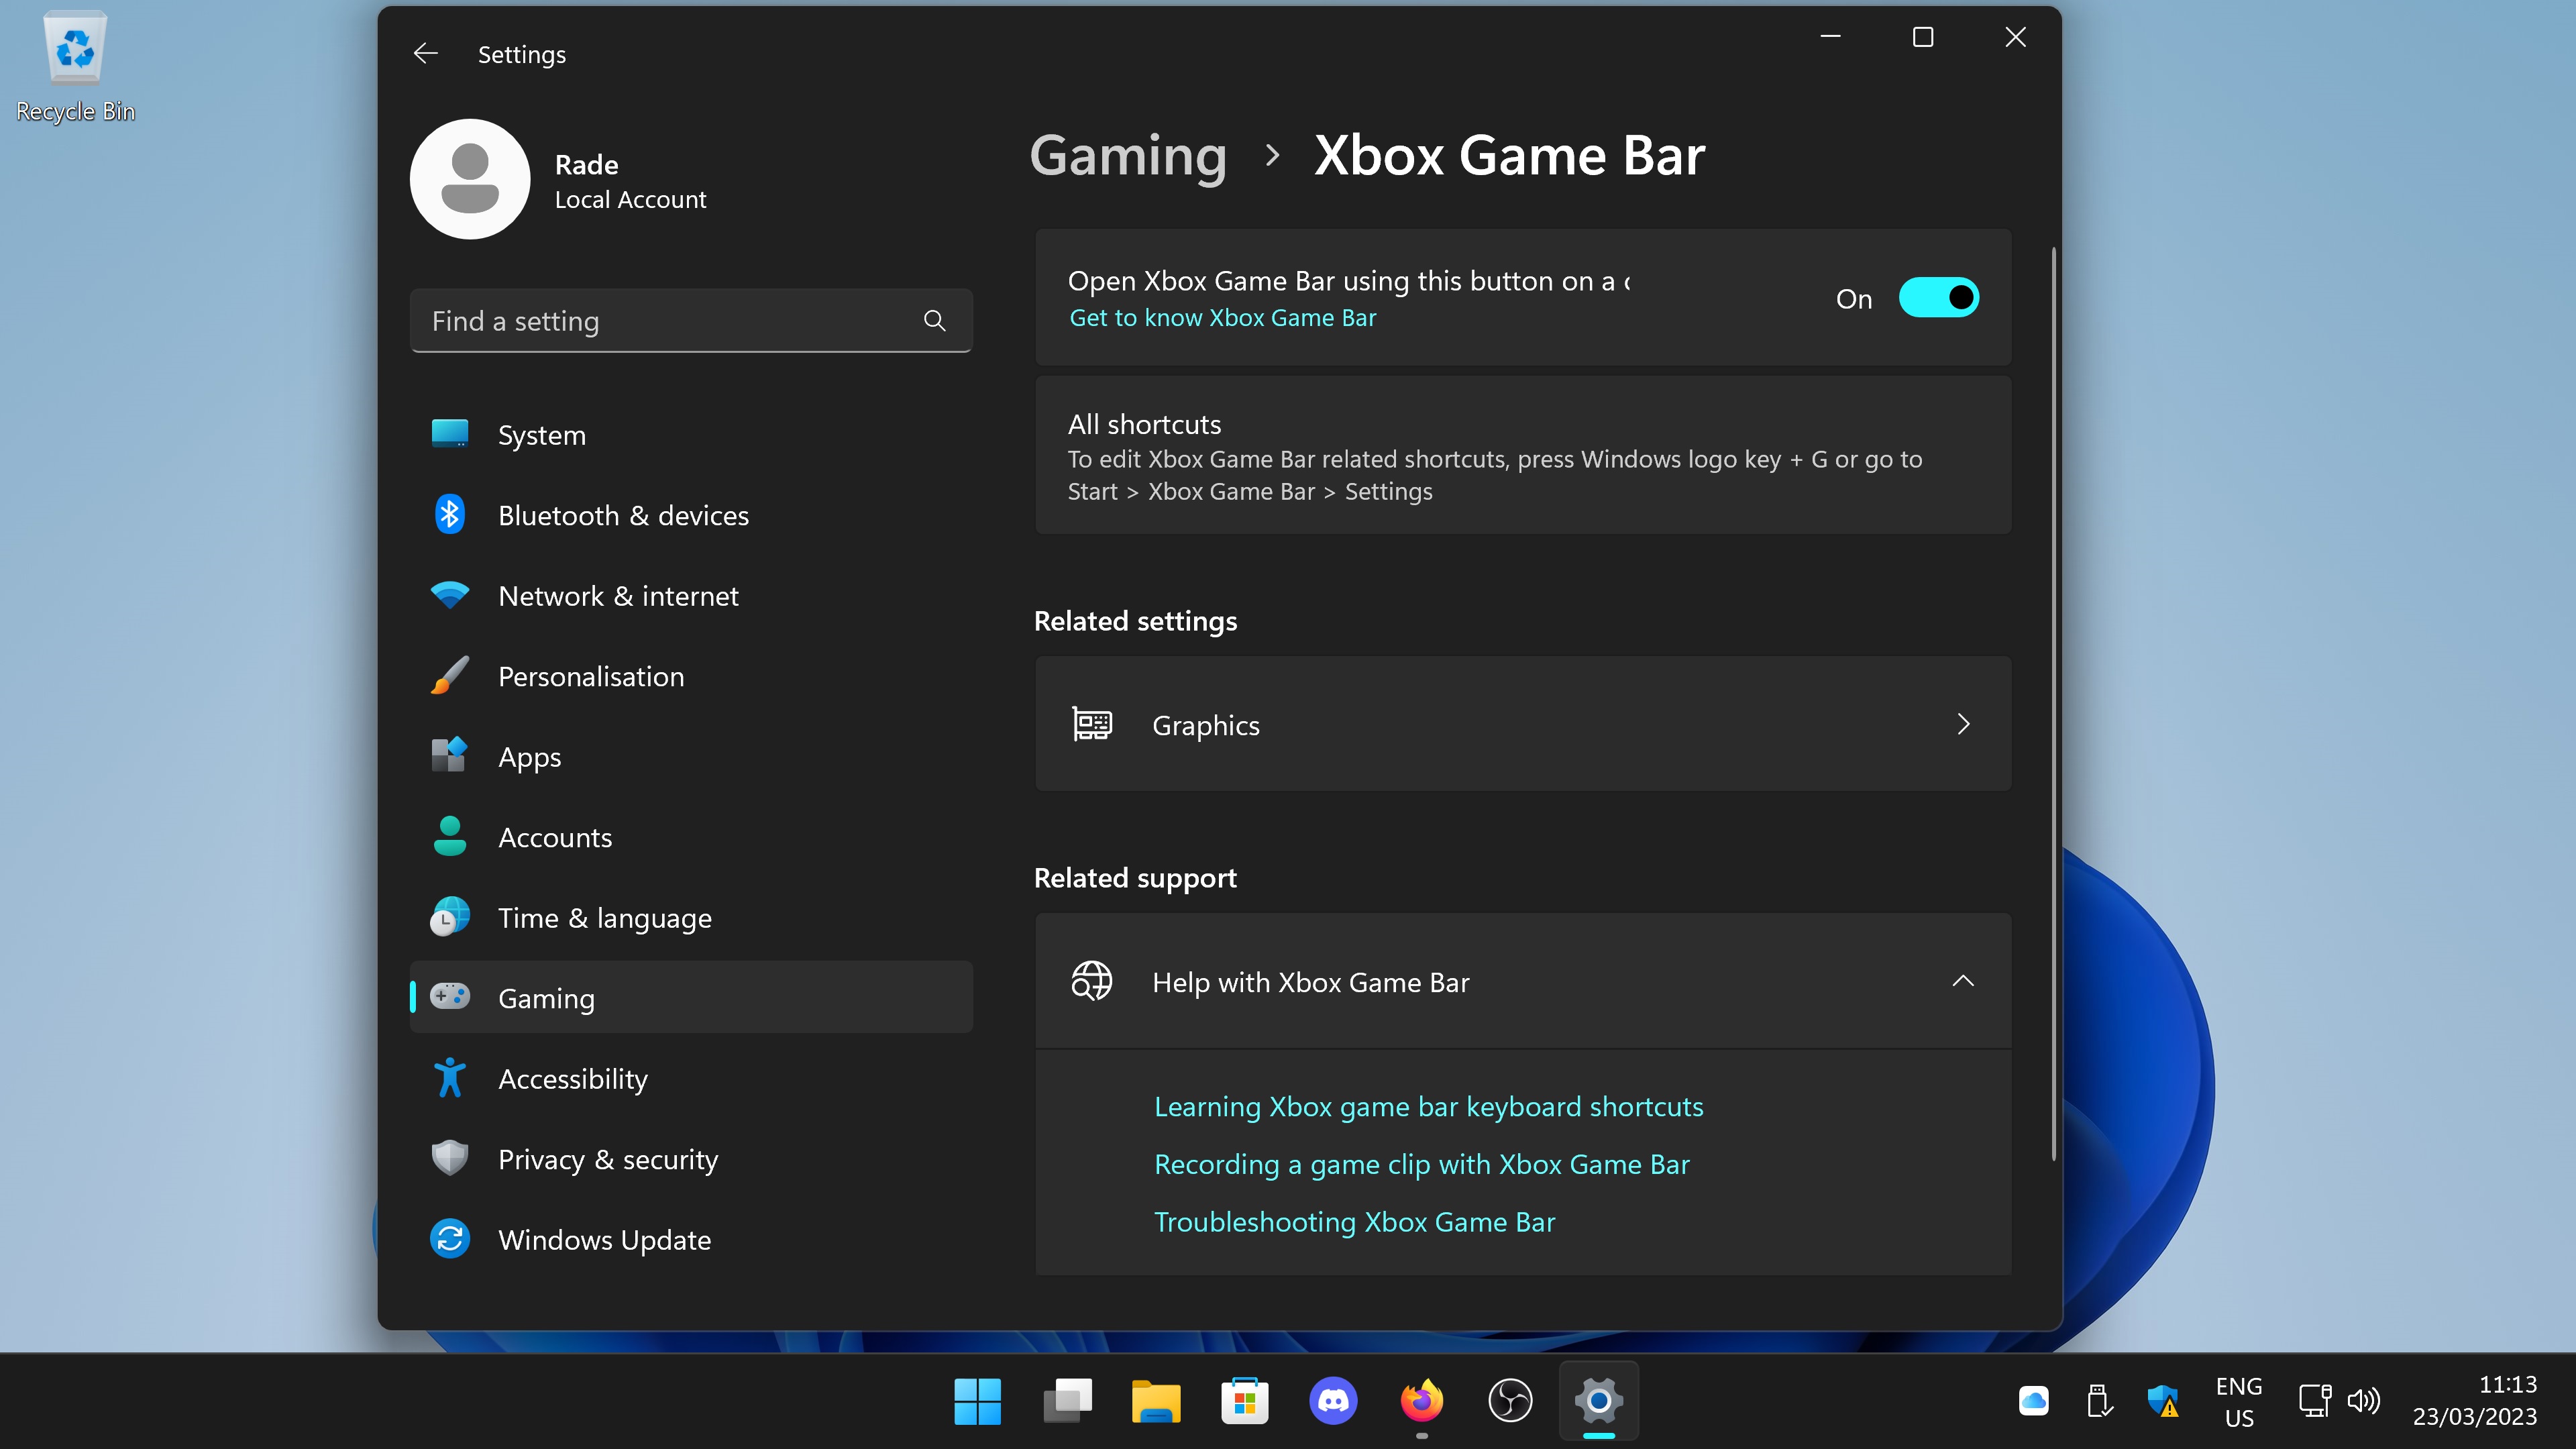
Go to Settings > Gaming > Xbox Game Bar and toggle the slider to off. Should you wish to capture your gameplay I would highly recommend OBS.
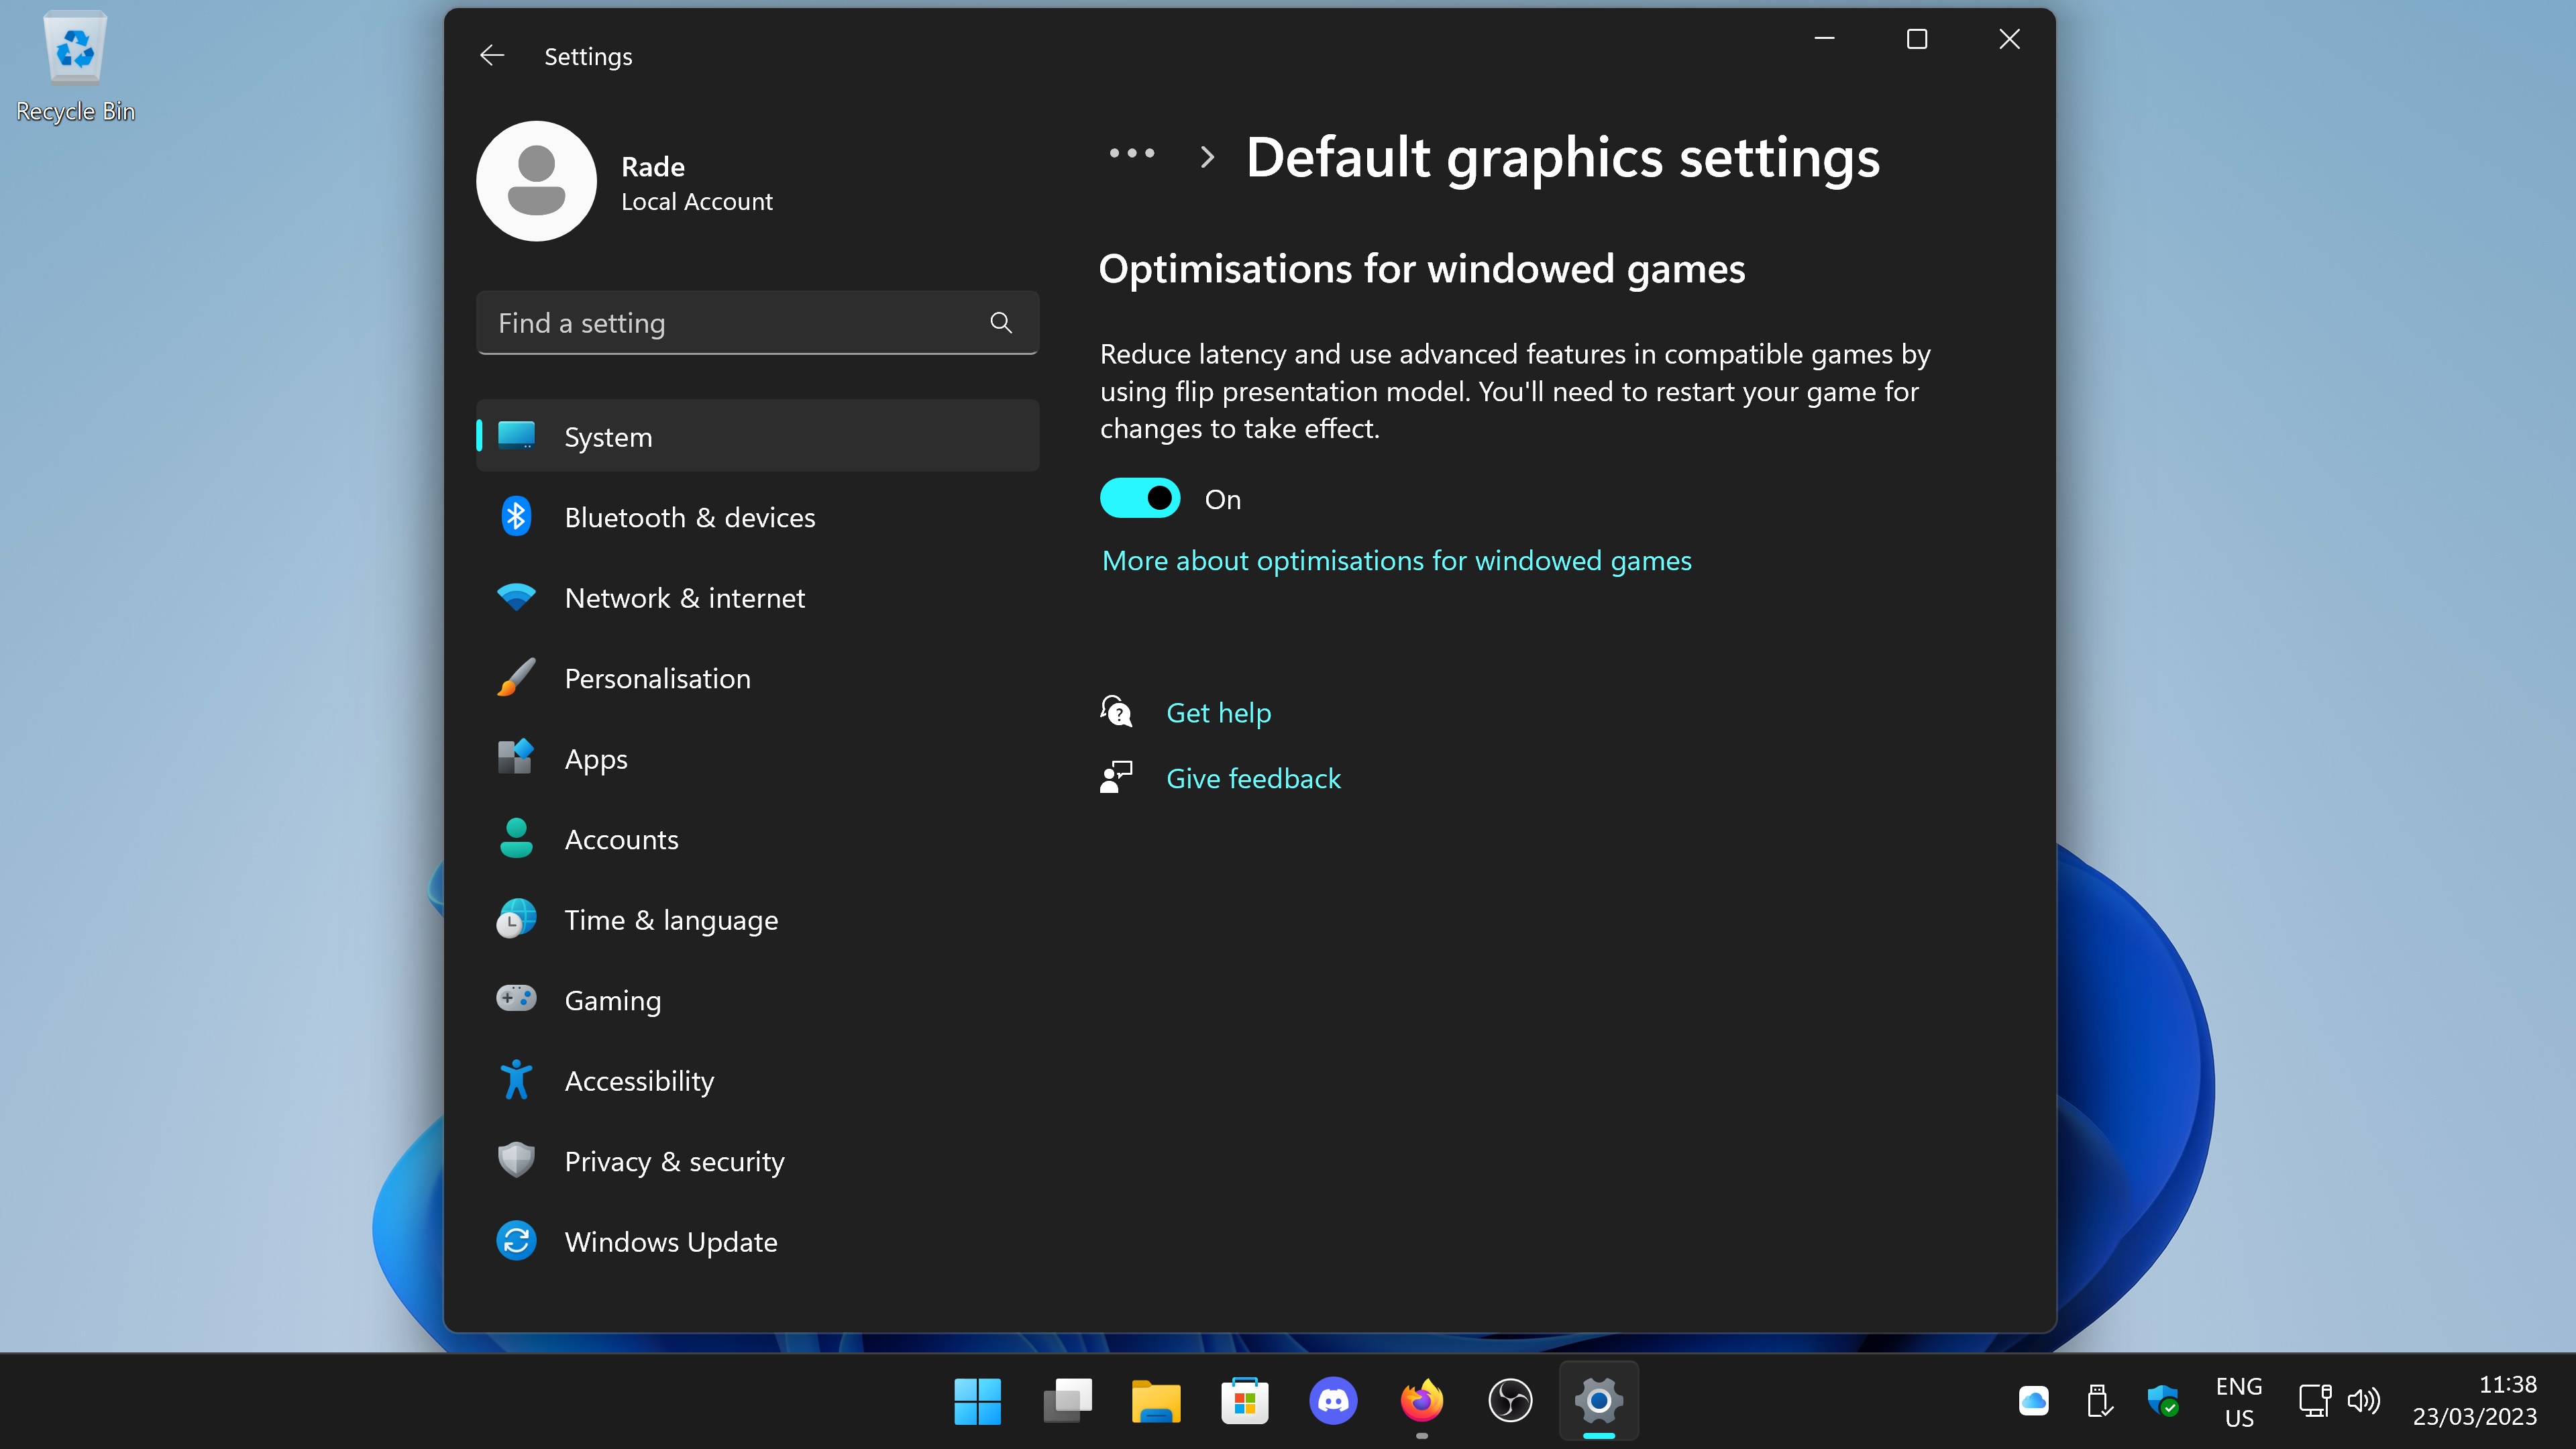
Go to System > Display > Graphics > Change Default Graphics Settings and turn on any additional graphic optimisation settings such as Hardware Accelerated GPU Scheduling and Optimizations for windowed games. Your options available here will depend on your graphic card.
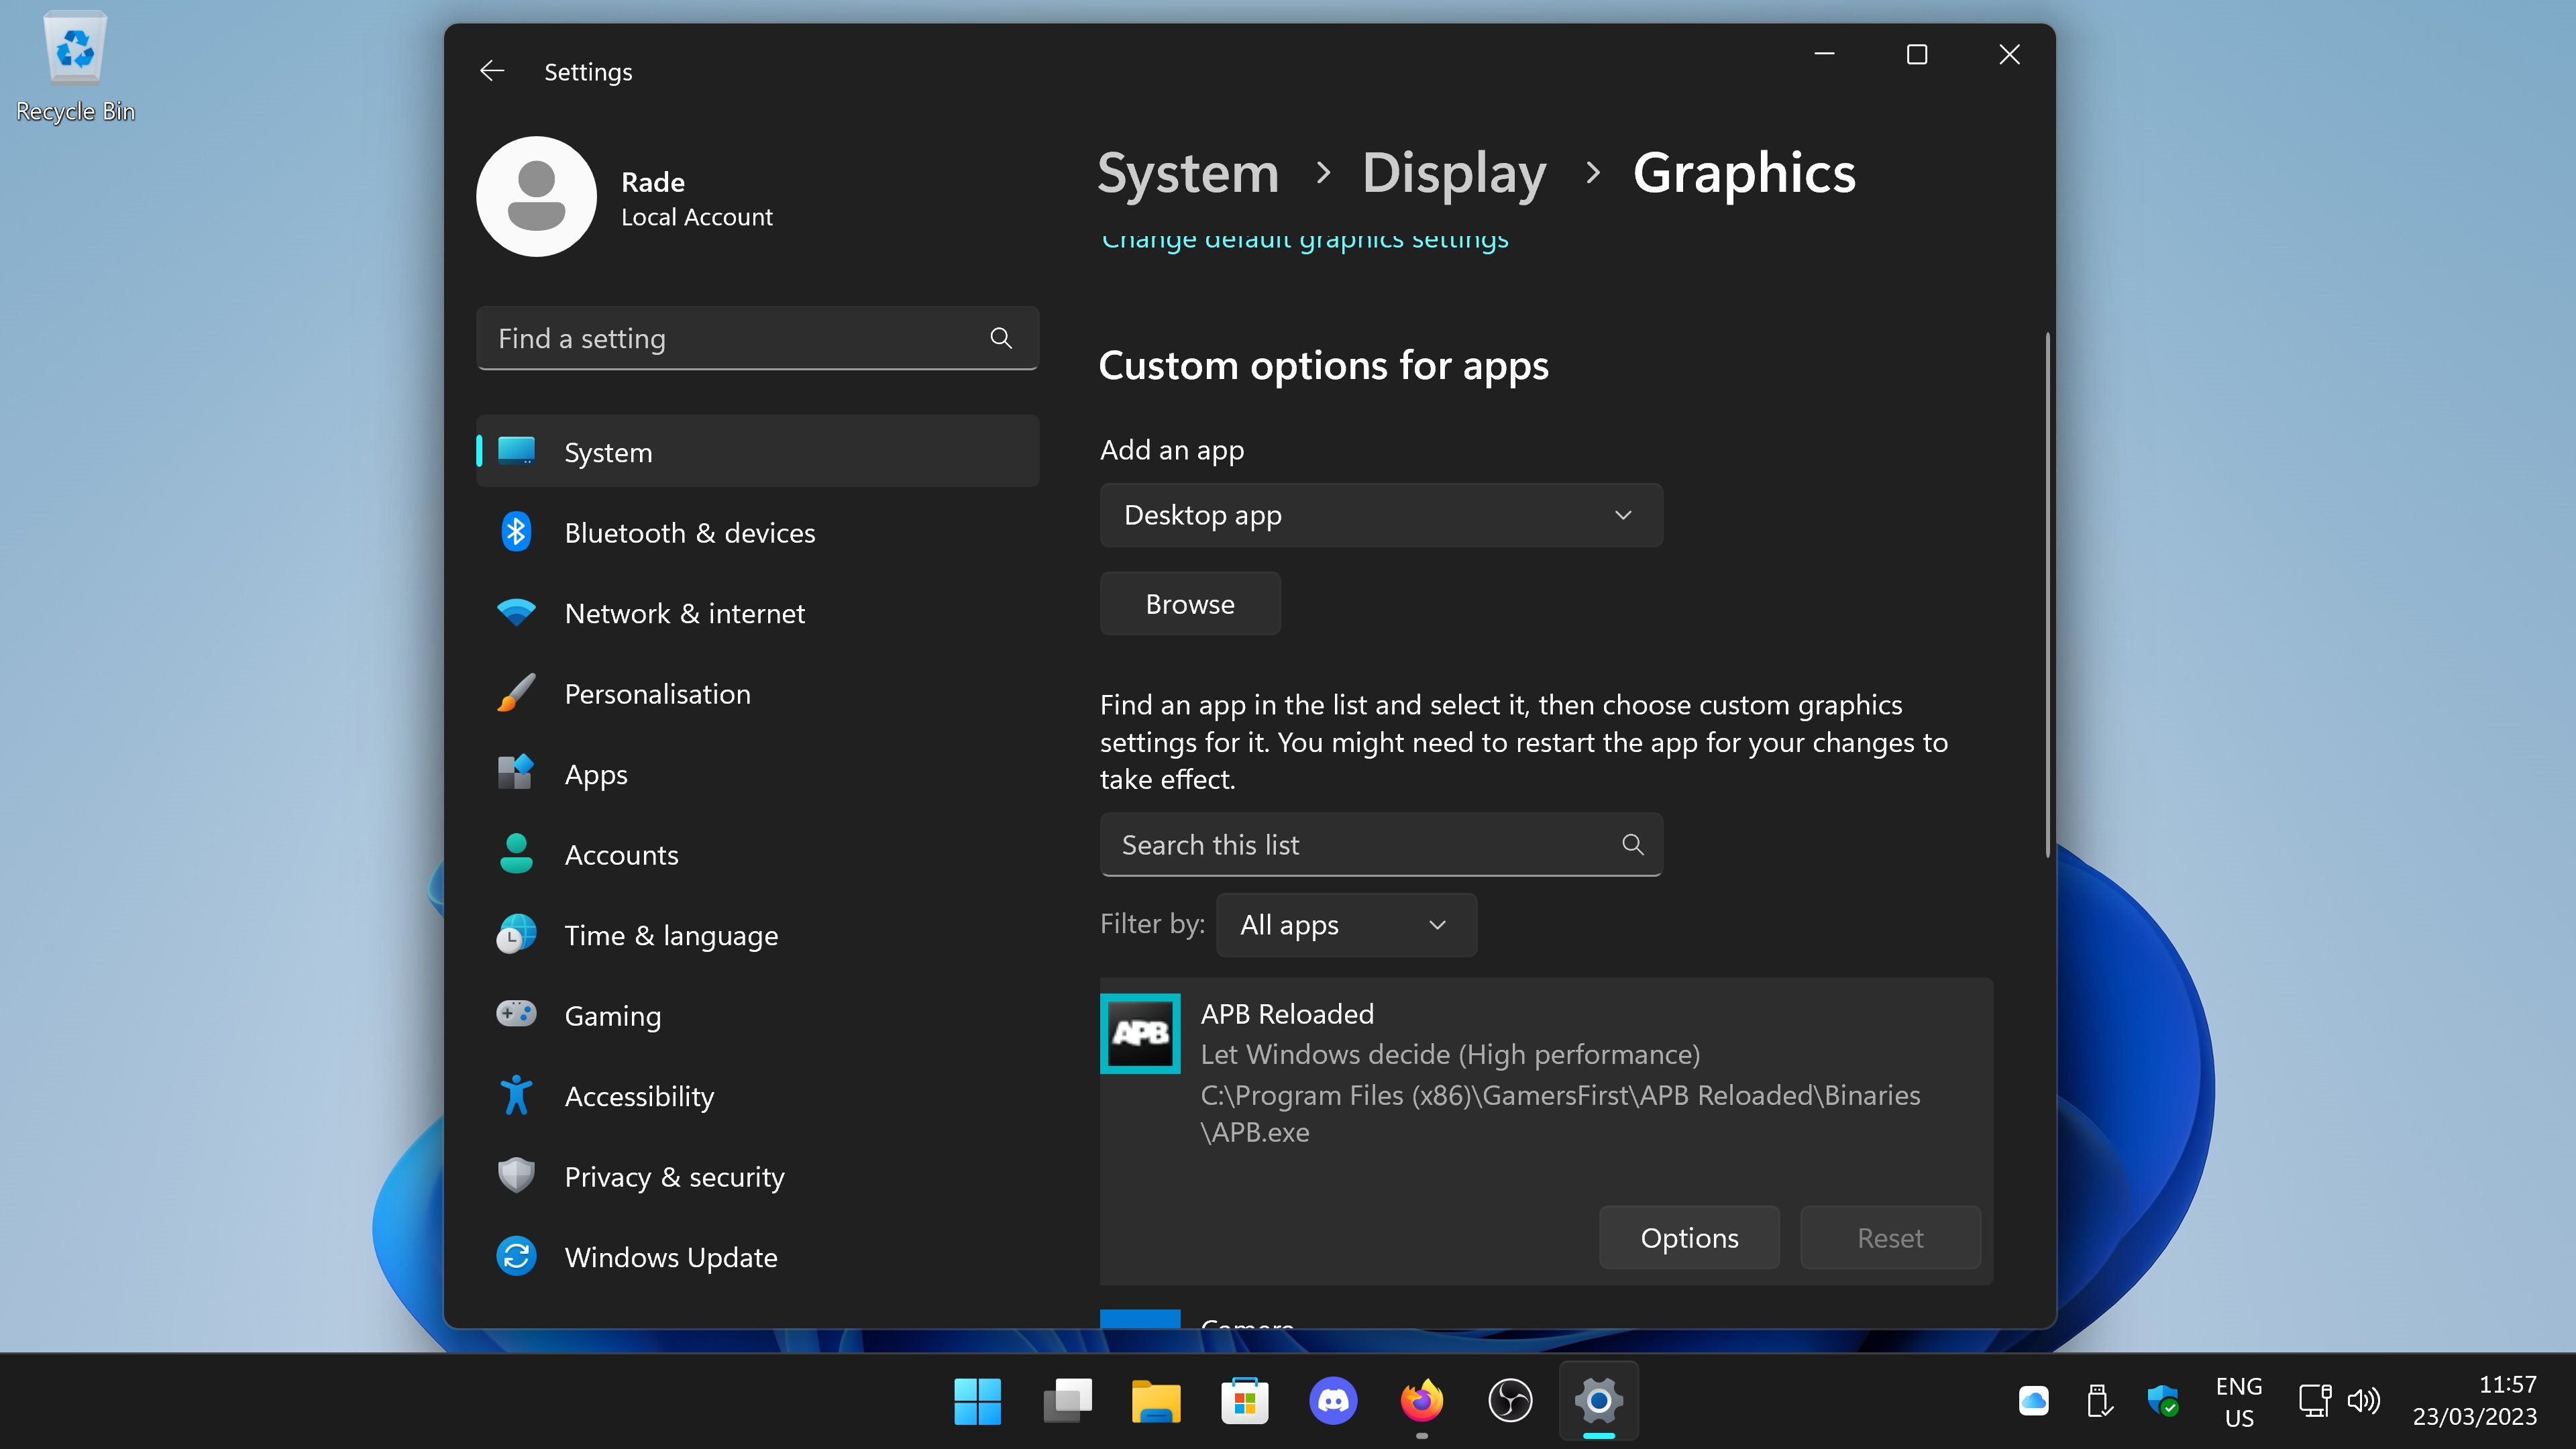
Go to System > Display > Graphics and make sure your gaming apps are set to High Performance. Windows will by default automatically set this option for you.
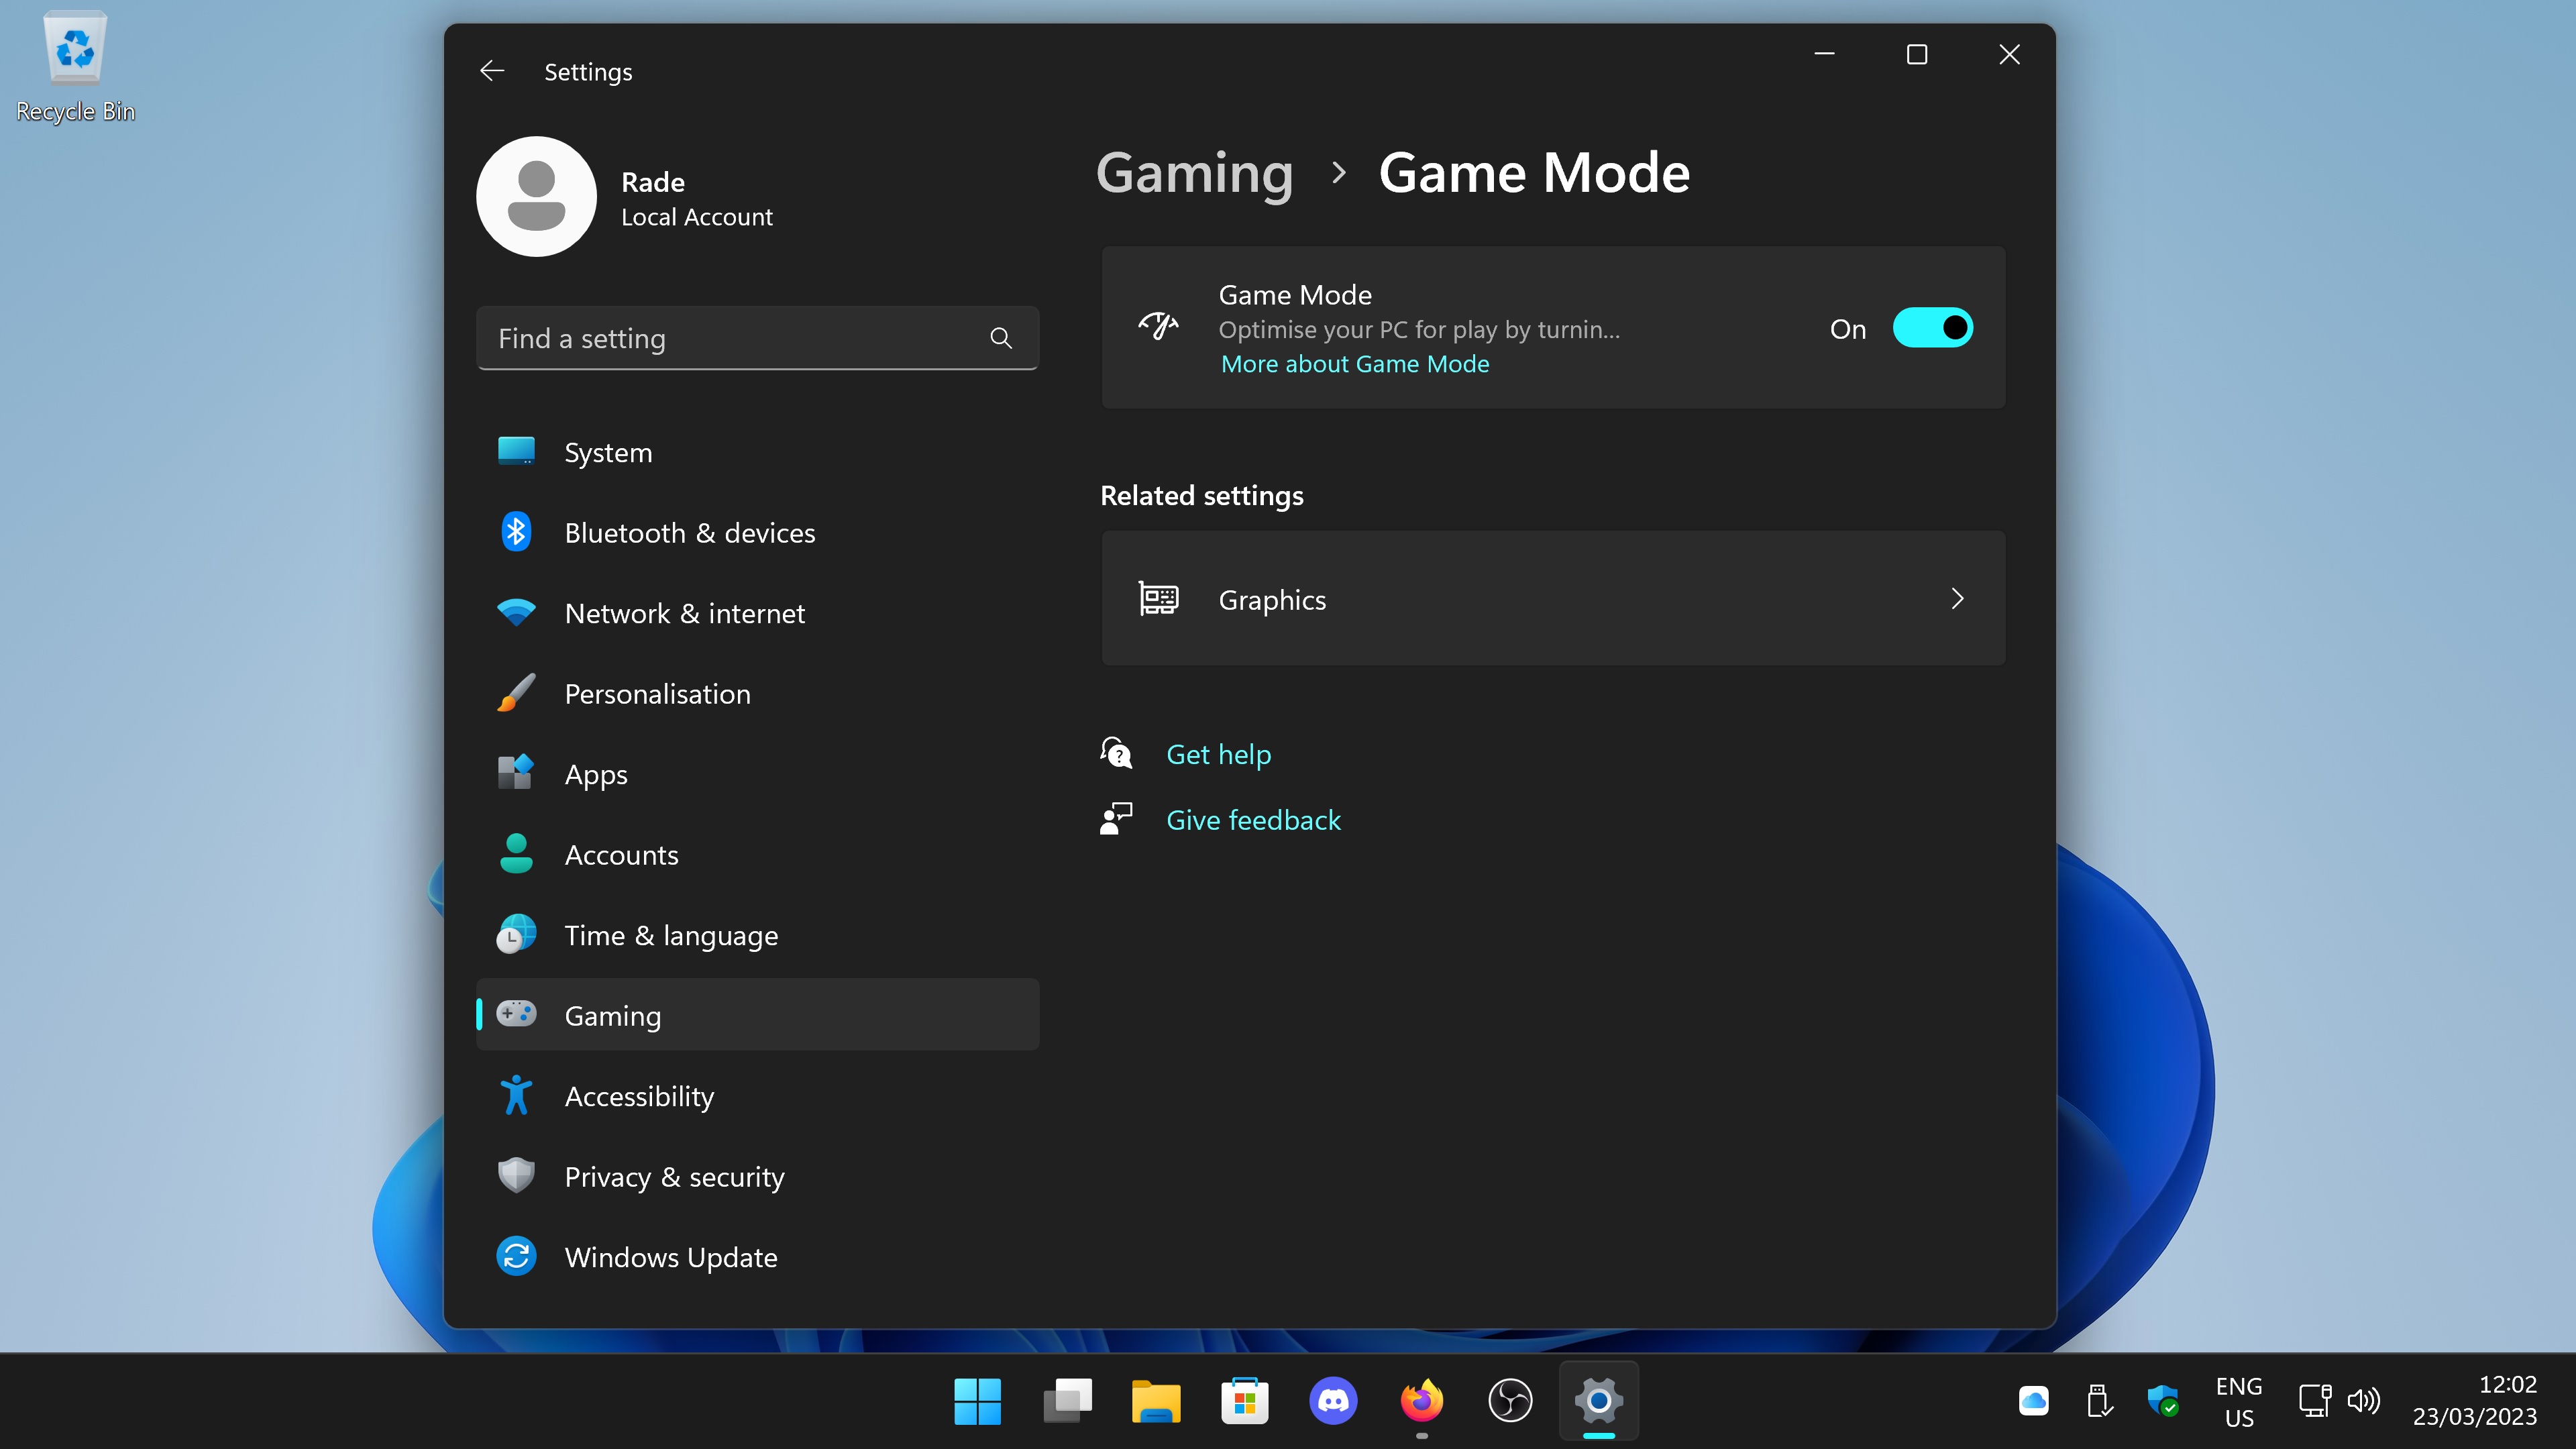
By default game mode is enabled in Windows, make sure it is still on as it will prevent windows updating in the background and notification pop ups whilst playing.
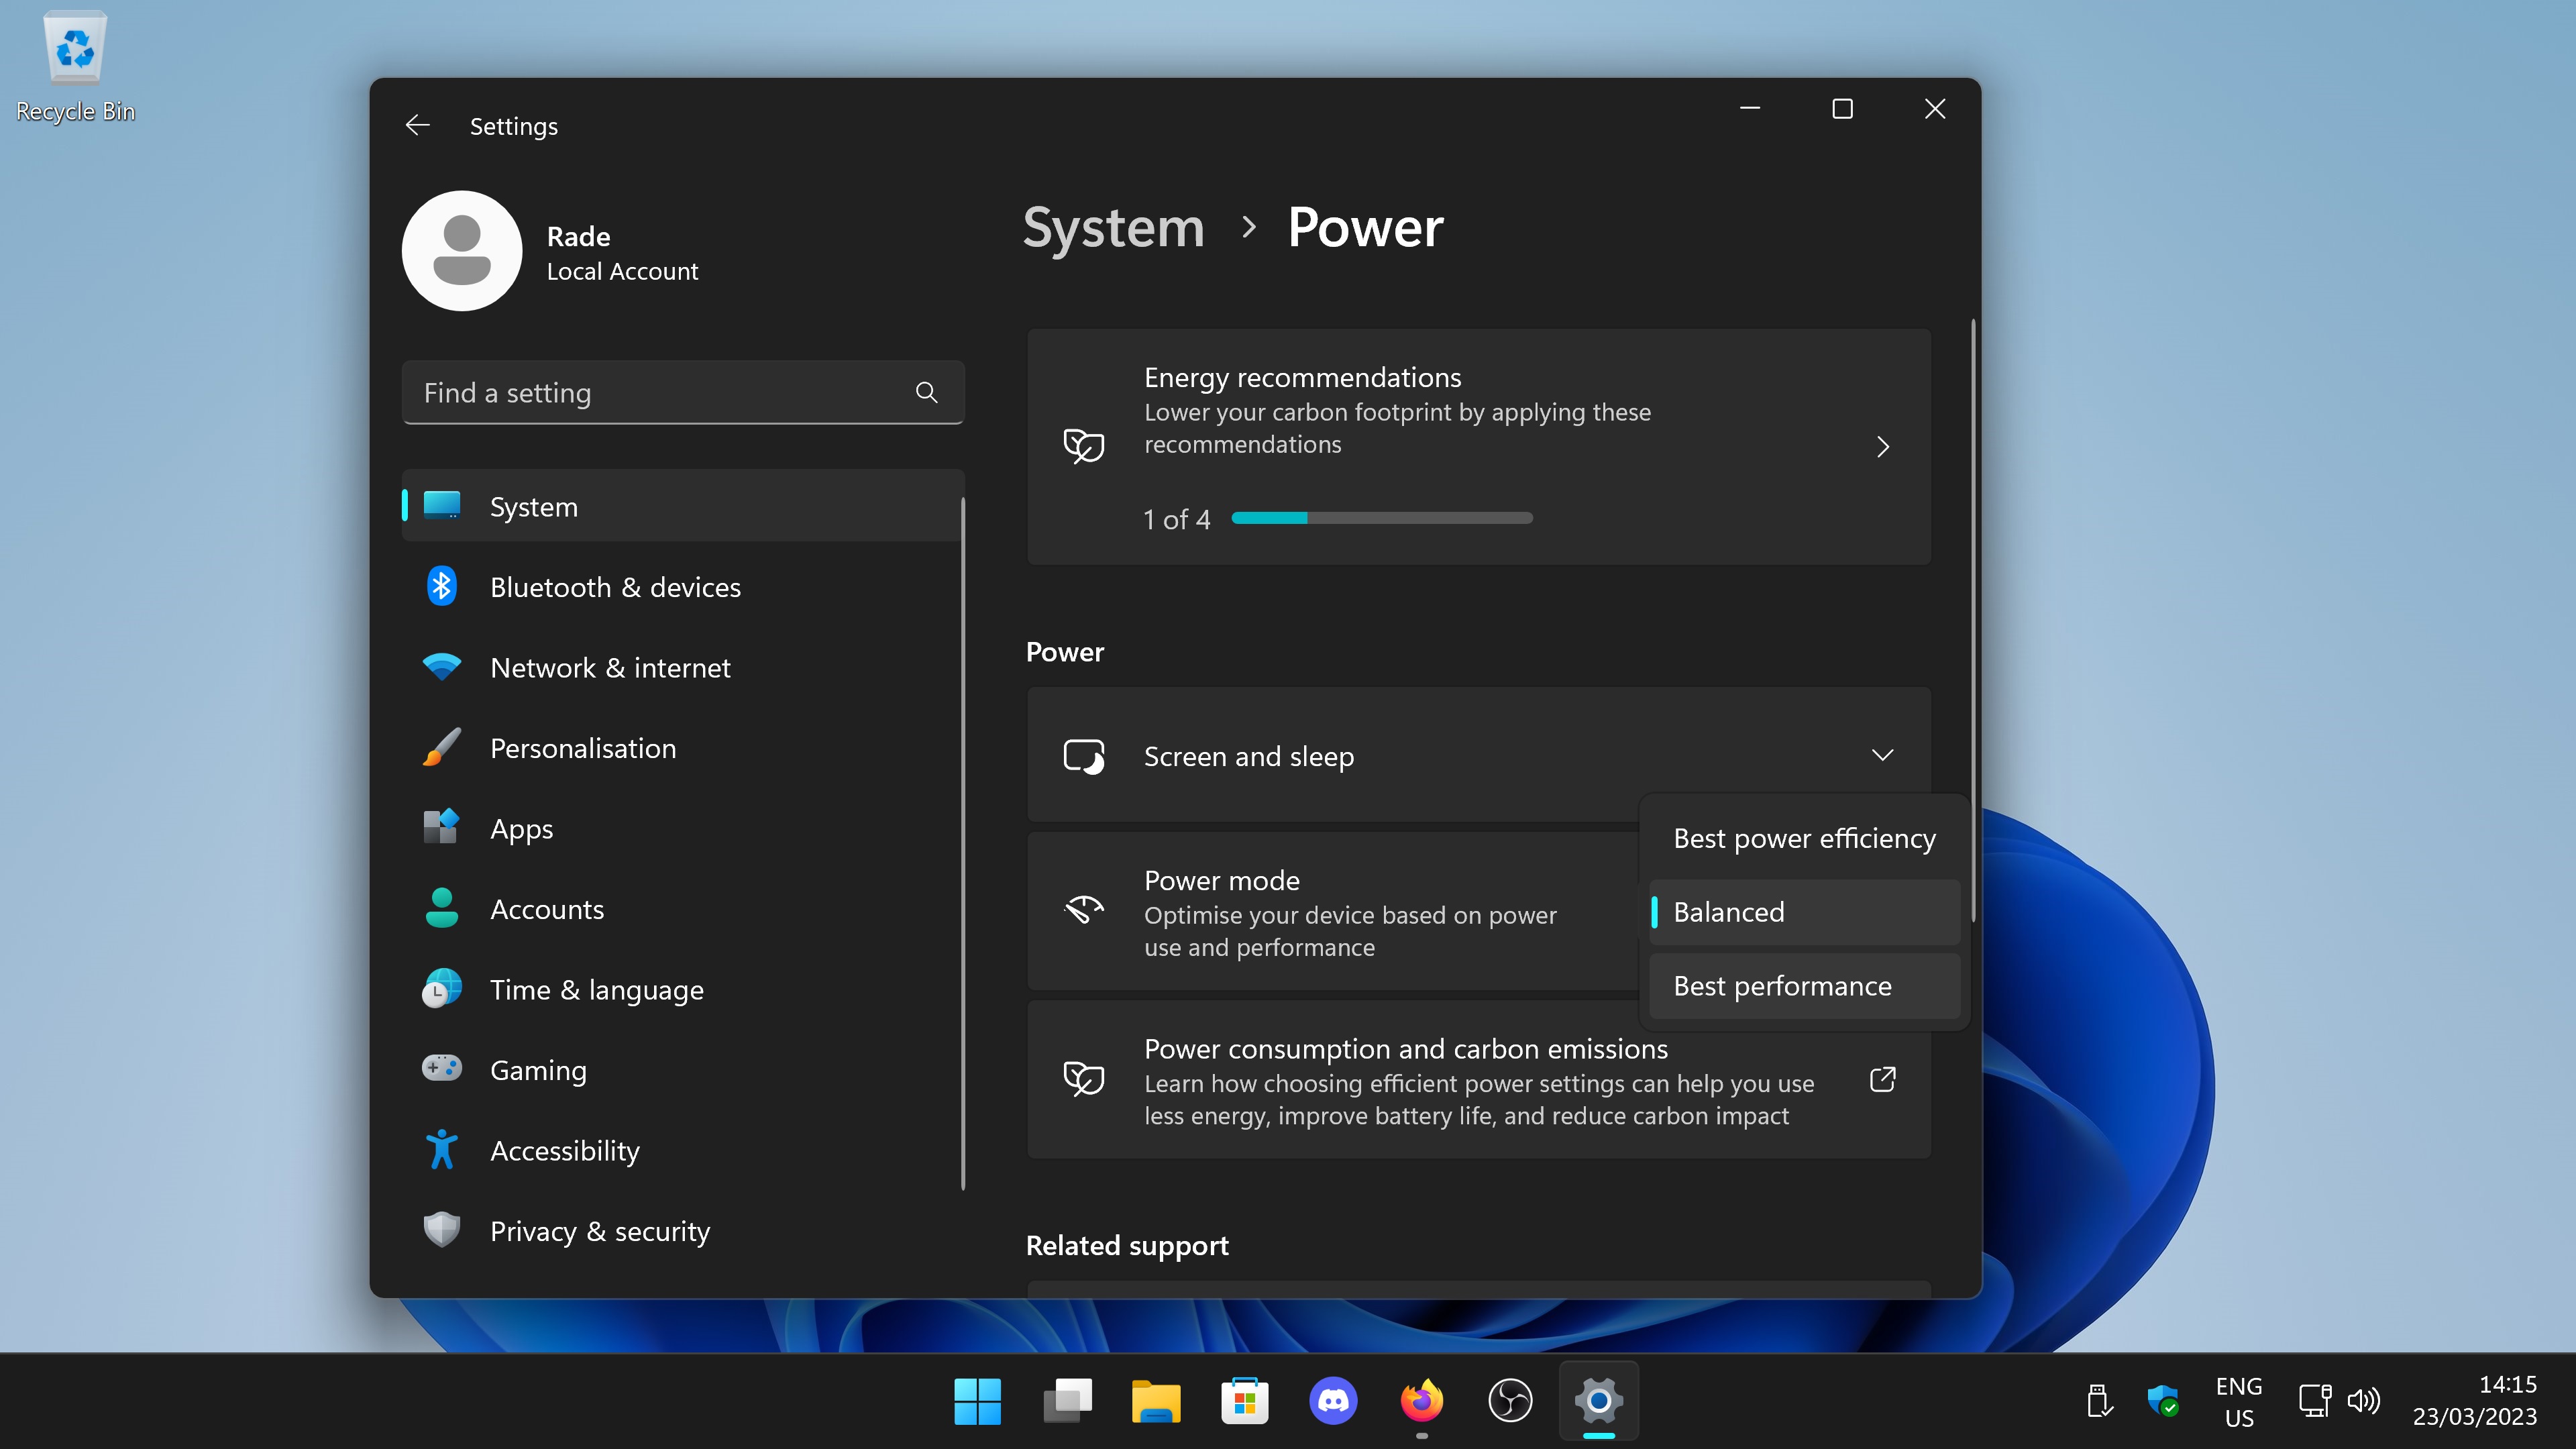
By default Windows will be set to balanced, for gaming you want maximum performance.
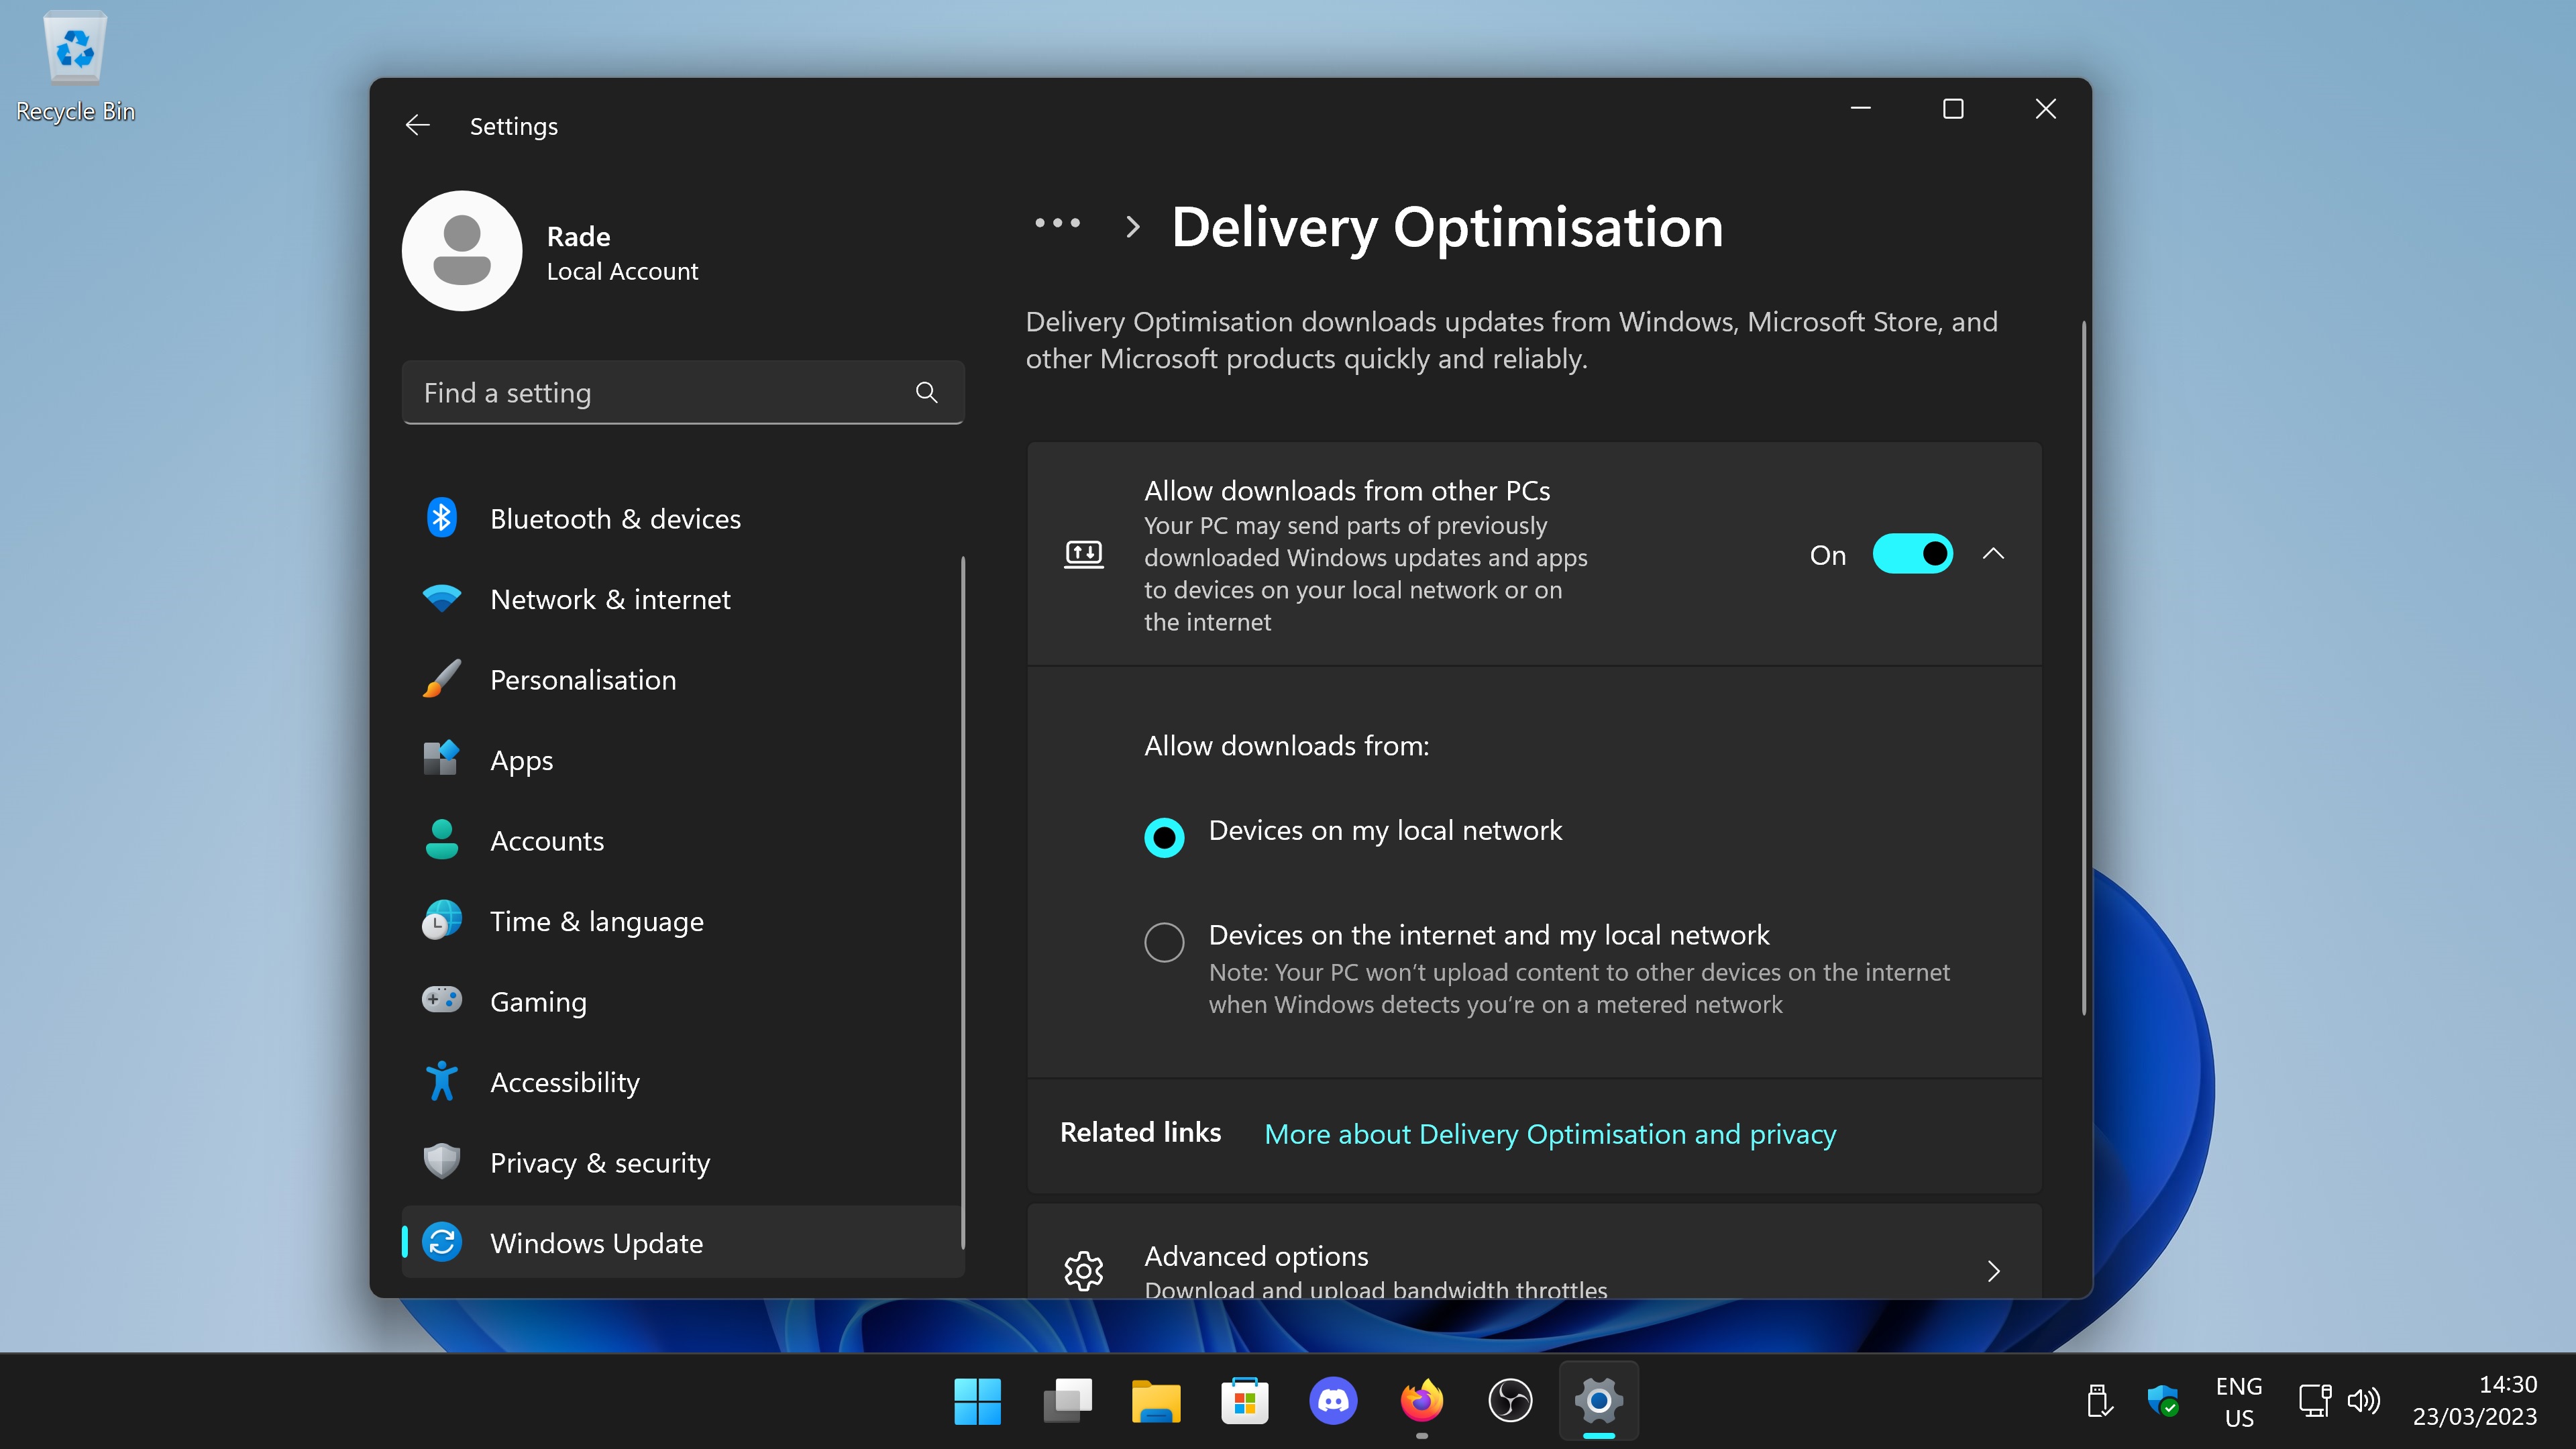
By default Windows may send parts of previously downloaded Windows updates and apps to devices on your local network. As a gamer you do not want your CPU and network card being bogged down by the additional overhead this may cause.
Disable the setting by going to Windows Update > Advanced options > Delivery Optimisation > Allow downloads from other PCs, and toggle it to off.
This feature keeps Microsoft Edge running in the background, the idea so that it will launch quicker. By doing so it does use some of your PC's resources. I would also turn off 'Continue running background extensions and apps when Microsoft Edge is closed'.
In Windows 10 there was an option to disable apps running in the background. In Windows 11 this option does not exist but instead you can go through every app and allow or disallow it from running in the background by navigating to Apps > Installed Apps > Then click on the three little dots next to each app and select 'Advanced Options'. You can then toggle whether to allow that app to run in the background.
For gaming I would recommend disabling all apps running in the background and to easily achieve this you can use the Group Policy Editor. The Group Policy Editor is a great tool and one that also contains information about each setting, meaning you can learn about the options you are changing.
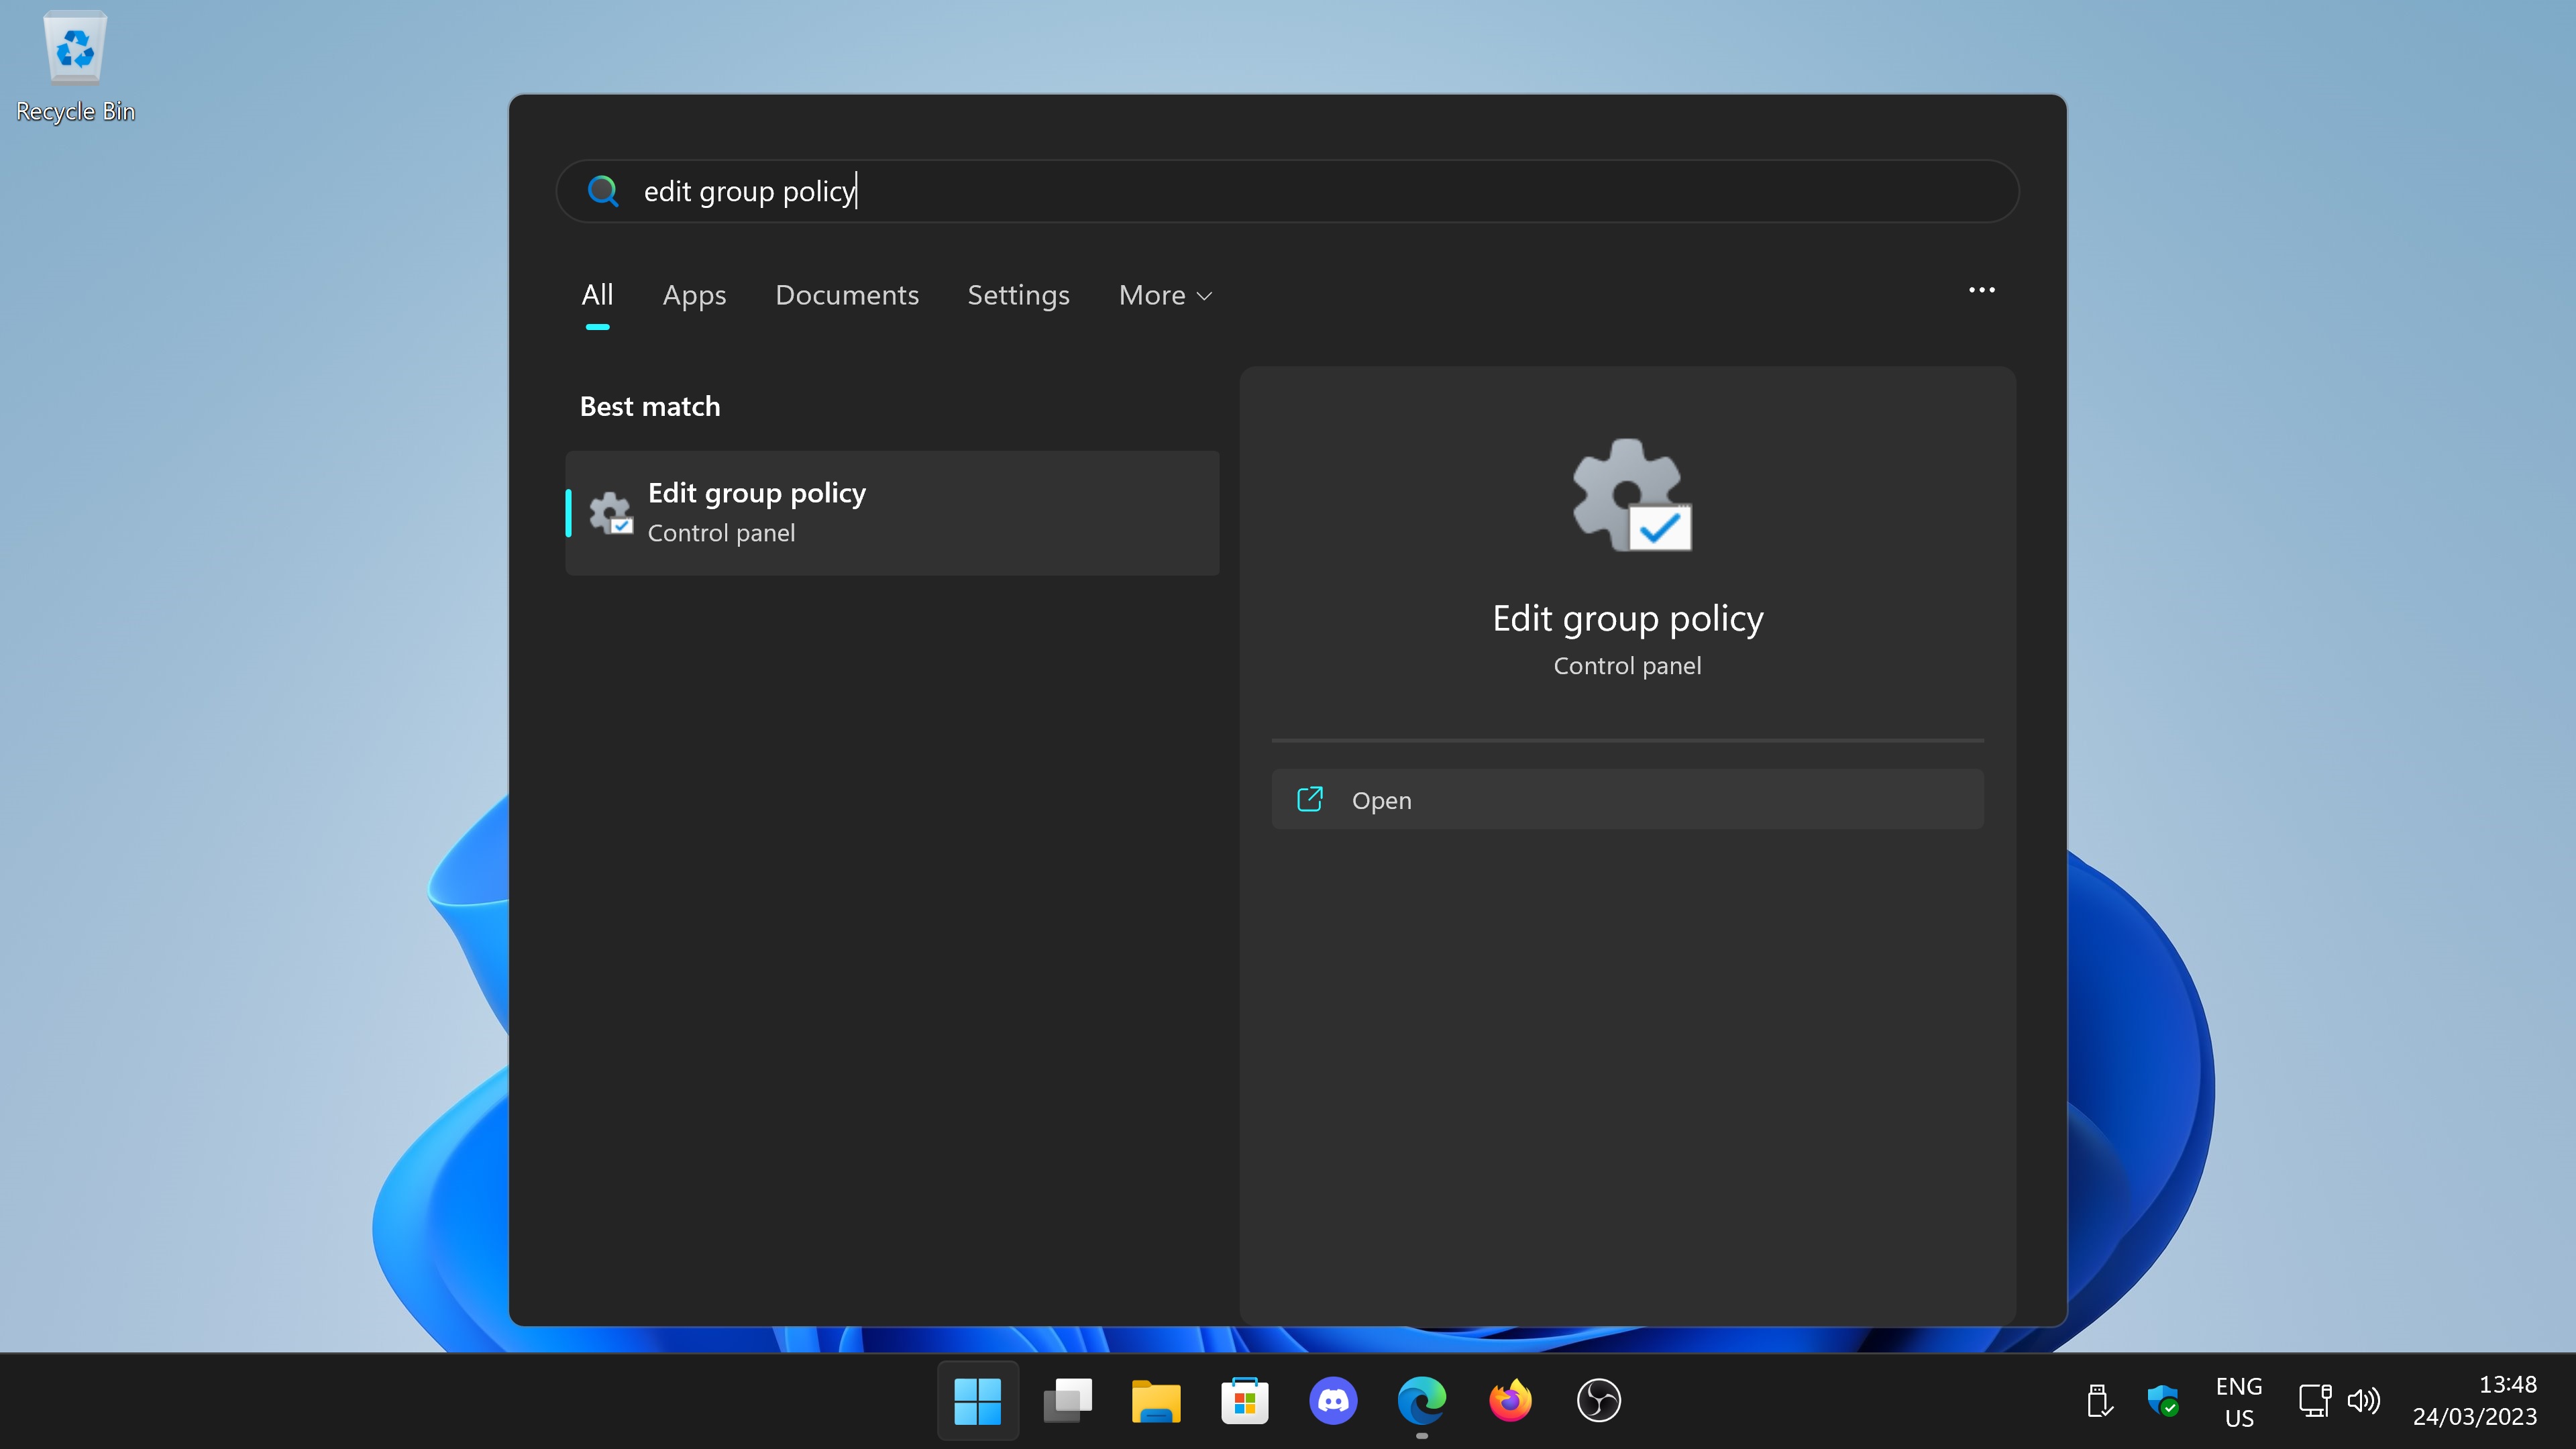
Open Group Policy Editor by searching for 'Edit Group Policy' in the start menu.
Local Computer Policy > Computer Configuration > Administrative Templates > Windows Components > Windows Error Reporting
Turn off Windows Error Reporting by changing the setting to 'Enabled'.
Local Computer Policy > Computer Configuration > Administrative Templates > Windows Components > Windows Game Recording and Broadcasting
Turn off Windows Game Recording and Broadcasting by changing the setting to 'Disabled'
These next batch of settings relate to NTFS, these settings will reduce overhead and help squeeze that bit of extra performance.
Local Computer Policy > Computer Configuration > Administrative Templates > system > Filesystem > NTFS > Do not allow encryption on all NTFS volumes
Turn off Do not allow encryption on all NTFS volumes by changing the setting to 'Enabled'.
Local Computer Policy > Computer Configuration > Administrative Templates > system > Filesystem > NTFS > Enable NTFS non-paged pool usage
Turn on Enable NTFS non-paged pool usage by changing the setting to 'Enabled'.
Local Computer Policy > Computer Configuration > Administrative Templates > system > Filesystem > NTFS > Short name creation options
Turn off Disable Short name creation options by changing the setting to 'Enabled' and ' Disabled on all volumes'
Task Manager

Settings > Apps > Startup

Go through your start up apps and disable anything you do not need to run. In my case I have disabled OneDrive, Microsoft Teams, SteelSeriesGG and iCloud.
Disable Xbox Gamebar

Go to Settings > Gaming > Xbox Game Bar and toggle the slider to off. Should you wish to capture your gameplay I would highly recommend OBS.
Enabled further graphic optimisation settings

Go to System > Display > Graphics > Change Default Graphics Settings and turn on any additional graphic optimisation settings such as Hardware Accelerated GPU Scheduling and Optimizations for windowed games. Your options available here will depend on your graphic card.
Make sure Windows has your gaming app set to high performance

Go to System > Display > Graphics and make sure your gaming apps are set to High Performance. Windows will by default automatically set this option for you.
Make sure Game Mode is on

By default game mode is enabled in Windows, make sure it is still on as it will prevent windows updating in the background and notification pop ups whilst playing.
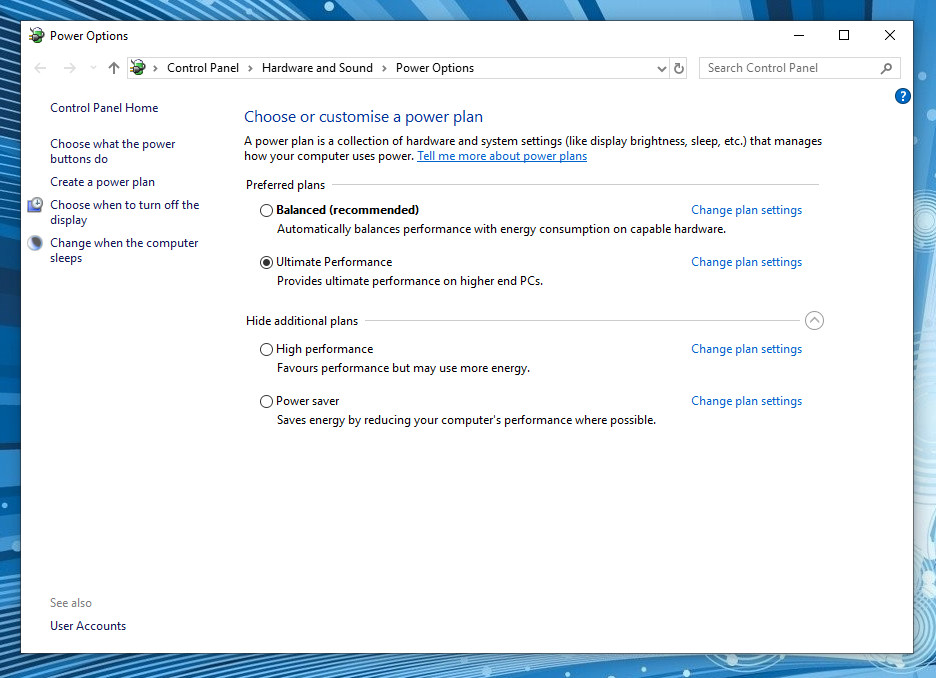
Set power mode to best performance

By default Windows will be set to balanced, for gaming you want maximum performance.
Prevent your PC sending Windows update to other PCs

By default Windows may send parts of previously downloaded Windows updates and apps to devices on your local network. As a gamer you do not want your CPU and network card being bogged down by the additional overhead this may cause.
Disable the setting by going to Windows Update > Advanced options > Delivery Optimisation > Allow downloads from other PCs, and toggle it to off.
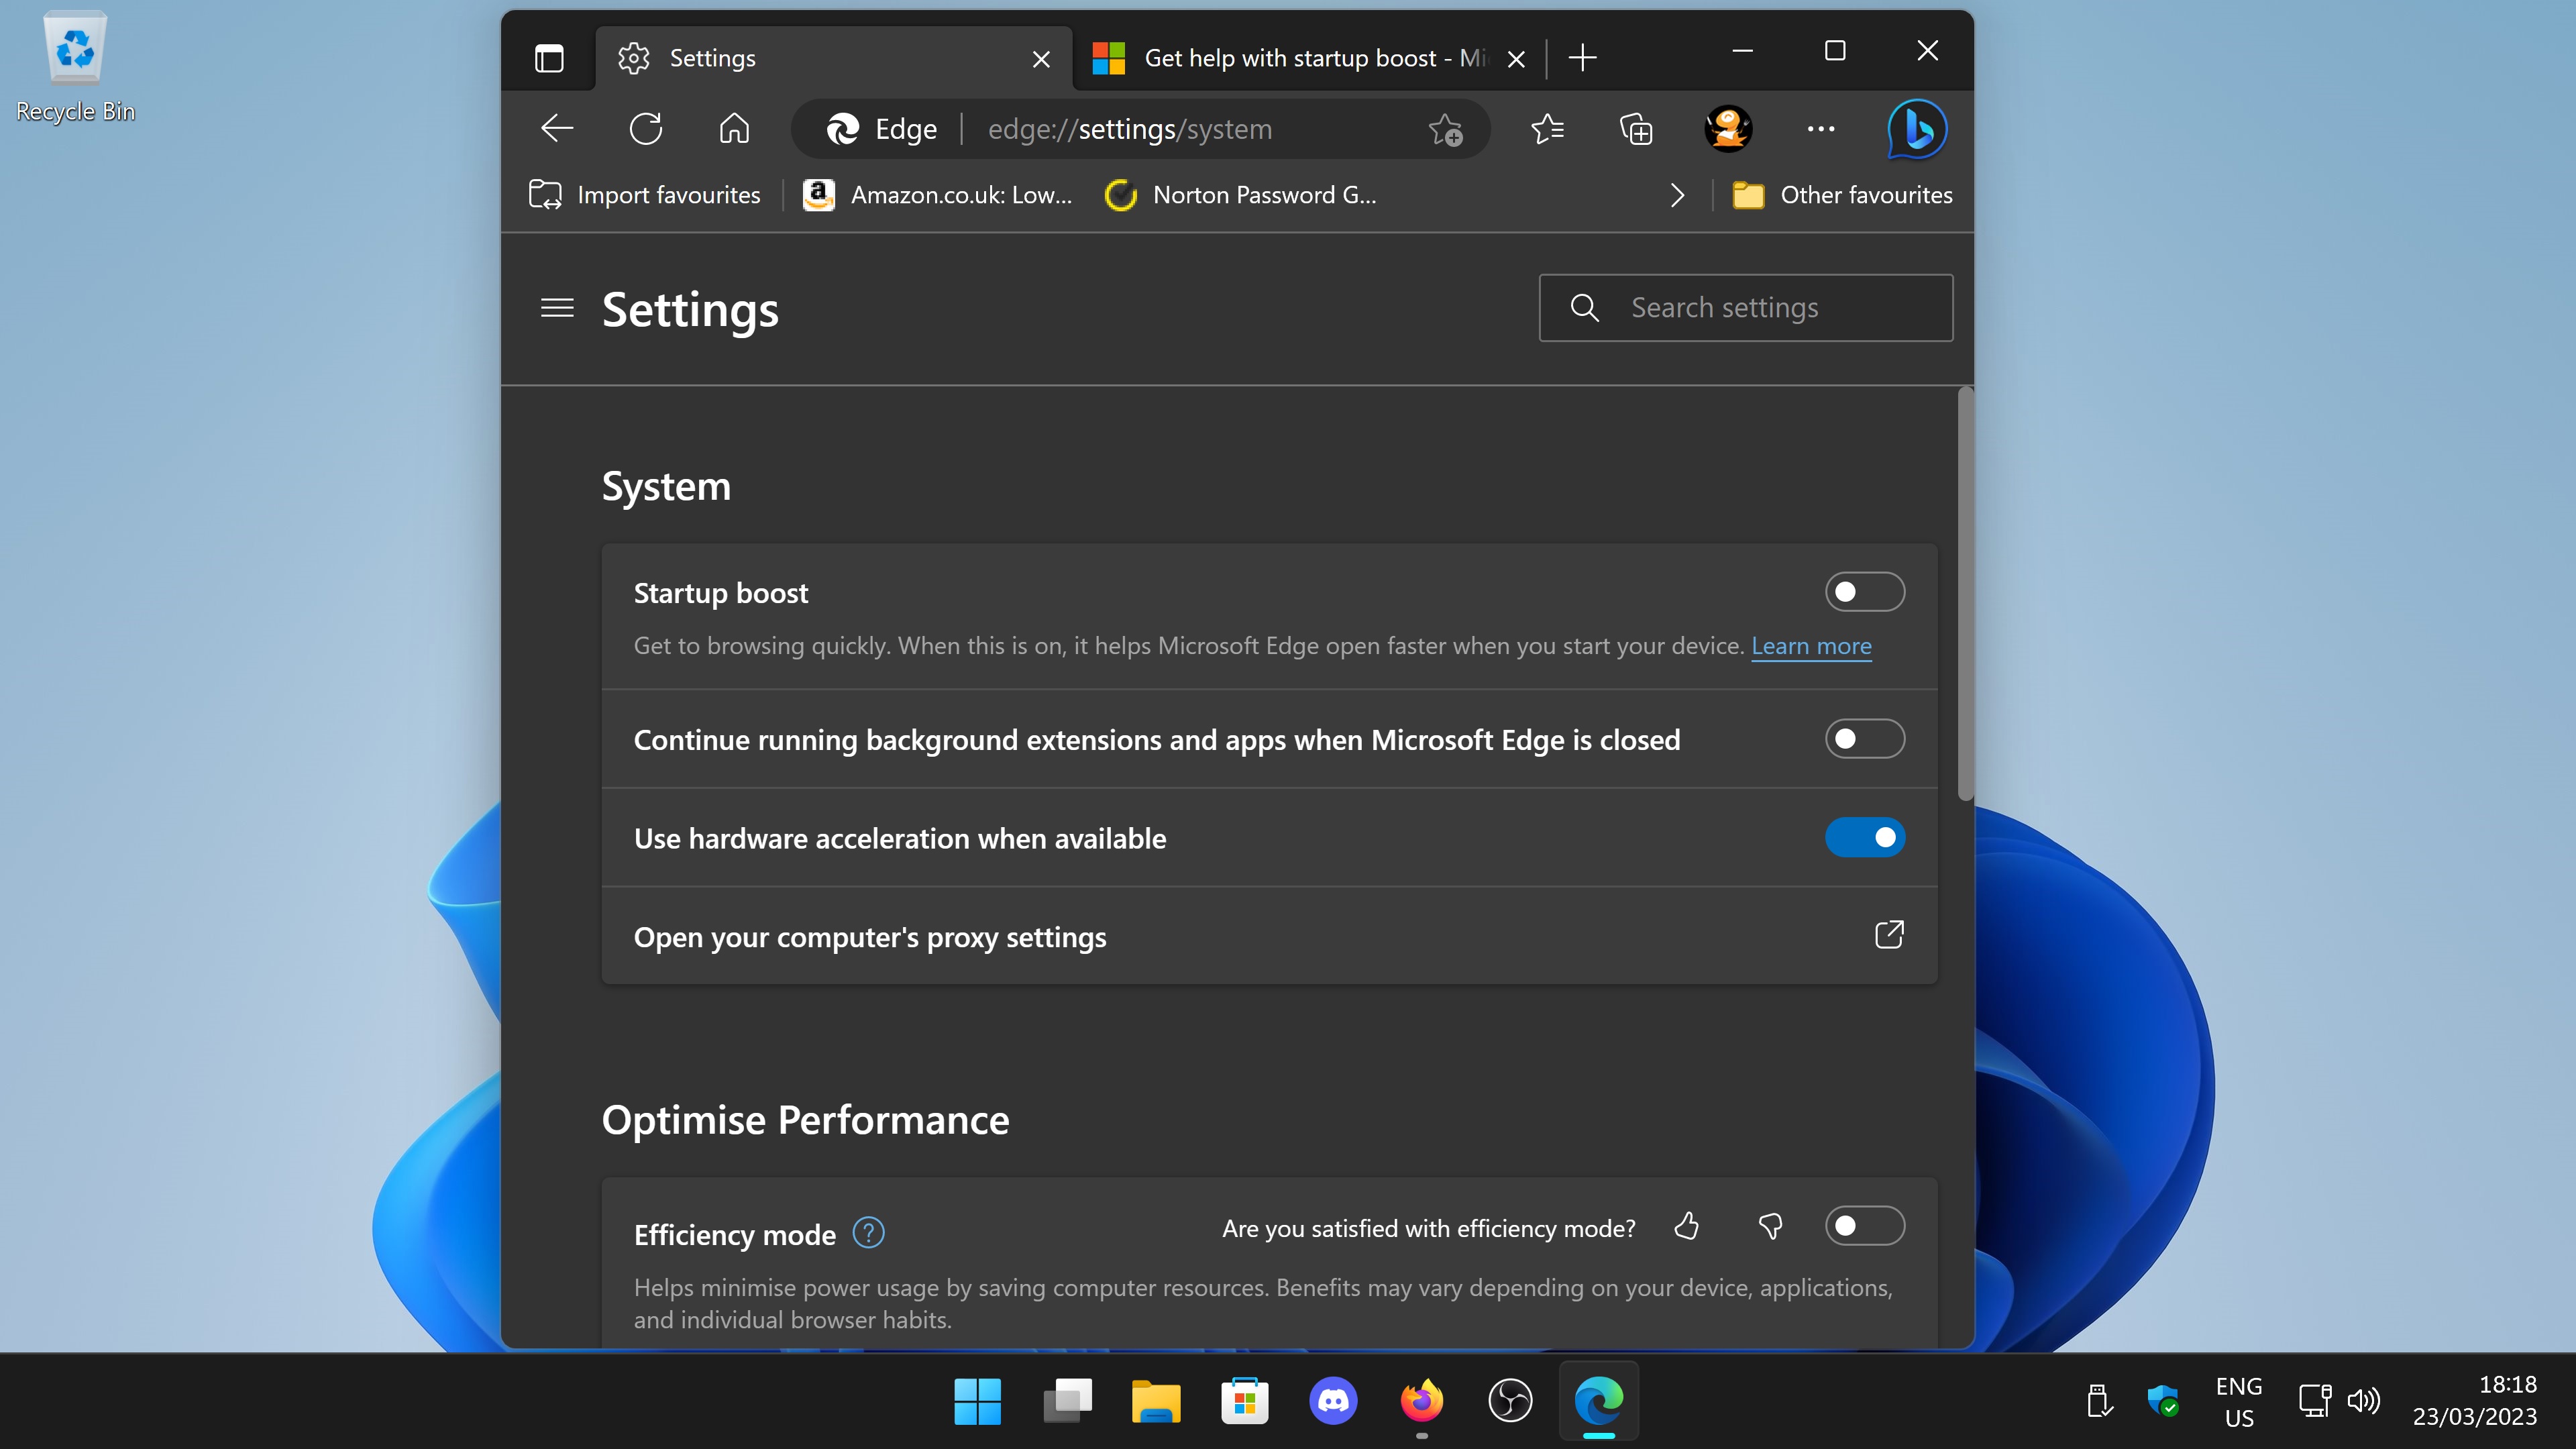
Turn off Microsoft Edge Start up Boost

This feature keeps Microsoft Edge running in the background, the idea so that it will launch quicker. By doing so it does use some of your PC's resources. I would also turn off 'Continue running background extensions and apps when Microsoft Edge is closed'.
Disable all apps from running in the background
In Windows 10 there was an option to disable apps running in the background. In Windows 11 this option does not exist but instead you can go through every app and allow or disallow it from running in the background by navigating to Apps > Installed Apps > Then click on the three little dots next to each app and select 'Advanced Options'. You can then toggle whether to allow that app to run in the background.
For gaming I would recommend disabling all apps running in the background and to easily achieve this you can use the Group Policy Editor. The Group Policy Editor is a great tool and one that also contains information about each setting, meaning you can learn about the options you are changing.
Open Group Policy Editor by searching for 'Edit Group Policy' in the start menu.

Navigate to;
Local Computer Policy > Computer Configuration > Administrative Templates > Windows Components > App Privacy
Find 'Let Windows apps run in the background' and change this to 'Enabled > Force Deny'.
Change further Group Policy settings
Local Computer Policy > Computer Configuration > Administrative Templates > Windows Components > App Privacy
Find 'Let Windows apps run in the background' and change this to 'Enabled > Force Deny'.
Change further Group Policy settings
Whilst we have the Group Policy Editor open, here are further settings I would recommend changing.
Local Computer Policy > Computer Configuration > Administrative Templates > Windows Components > Desktop Gadgets
Turn off desktop gadgets by changing the setting to 'Enabled'.
Disable desktop gadgets
Local Computer Policy > Computer Configuration > Administrative Templates > Windows Components > Desktop Gadgets
Turn off desktop gadgets by changing the setting to 'Enabled'.
Turn Off user-installed desktop gagets by chaning the setting to 'Enabled'
Note, you need to disable both.
Disable Windows Error Reporting
Local Computer Policy > Computer Configuration > Administrative Templates > Windows Components > Windows Error Reporting
Turn off Windows Error Reporting by changing the setting to 'Enabled'.
Disable Windows Game Recording and Broadcasting
Local Computer Policy > Computer Configuration > Administrative Templates > Windows Components > Windows Game Recording and Broadcasting
Turn off Windows Game Recording and Broadcasting by changing the setting to 'Disabled'
These next batch of settings relate to NTFS, these settings will reduce overhead and help squeeze that bit of extra performance.
Do not allow compression on all NTFS volumes
Local Computer Policy > Computer Configuration > Administrative Templates > system > Filesystem > NTFS > Do not allow compression on all NTFS volumes
Turn off Do not allow compression on all NTFS volumes by changing the setting to 'Enabled'.
Turn off Do not allow compression on all NTFS volumes by changing the setting to 'Enabled'.
Do not allow encryption on all NTFS volumes
Local Computer Policy > Computer Configuration > Administrative Templates > system > Filesystem > NTFS > Do not allow encryption on all NTFS volumes
Turn off Do not allow encryption on all NTFS volumes by changing the setting to 'Enabled'.
Enable NTFS non-paged pool usage
Local Computer Policy > Computer Configuration > Administrative Templates > system > Filesystem > NTFS > Enable NTFS non-paged pool usage
Turn on Enable NTFS non-paged pool usage by changing the setting to 'Enabled'.
Disable Short name creation options
Local Computer Policy > Computer Configuration > Administrative Templates > system > Filesystem > NTFS > Short name creation options
Turn off Disable Short name creation options by changing the setting to 'Enabled' and ' Disabled on all volumes'
Optimise your Network card settings
If you are playing online games then your network card or its settings can have an impact on your latency. The reality when it comes to the majority of gaming motherboards is they have a Realtek network controller which in my experience means higher latency and more CPU overhead when compared to decent quality network card such as those made by Intel. If you are a competitive online gamer get yourself a decent Intel network card such as an Intel Ethernet Network Adapter I225-T1.
However, regardless of whatever network card / controller you have I would recommend turning off the following settings as they all impact latency and / or add additional overhead.
- Adaptive Interrupt Moderation
- Receive Segment Coalescing
- Flow Control
- Large Send Offload
- Priority & VLAN
- Wake on Magic Packet
- Wake on pattern match
- Energy Efficient Ethernet (EEE)
- Advanced EEE
- Green Ethernet
- Gigabit Lite
- Power Saving Mode
There are a few ways you can achieve this, you can use 'Network Connections' and change your adapter properties, editing registry settings for your network adapter or use Windows PowerShell which is the quickest option as you can copy and paste the below.
First run Windows PowerShell as administrator, and write or copy the following command,
Get-NetAdapter -Name *
This will list all your network adapters installed along with the name it has been assigned. On my PC I have 1 network adapter with a name of Ethernet. The name 'Ethernet' is used in the below commands and you will need to change this if your one is different.

If you now type,
Get-NetAdapterAdvancedProperty -Name "Ethernet"
It will show you a list with your current network adapter's settings and what each value is set to.

Should you wish to verify the settings have changed, run this command again to see the changes.
Disable Energy-Efficient Ethernet
Set-NetAdapterAdvancedProperty -Name "Ethernet" -DisplayName "Energy-Efficient Ethernet" -DisplayValue "Disabled"
Disable Flow Control
Set-NetAdapterAdvancedProperty -Name "Ethernet" -DisplayName "Flow Control" -DisplayValue "Disabled"
Disable Interrupt Moderation
Set-NetAdapterAdvancedProperty -Name "Ethernet" -DisplayName "Interrupt Moderation" -DisplayValue "Disabled"
Disable Large Send Offload v2 (IPv4)
Set-NetAdapterAdvancedProperty -Name "Ethernet" -DisplayName "Large Send Offload v2 (IPv4)" -DisplayValue "Disabled"
Disable Large Send Offload v2 (IPv6)
Set-NetAdapterAdvancedProperty -Name "Ethernet" -DisplayName "Large Send Offload v2 (IPv6)" -DisplayValue "Disabled"
Disable Priority & VLAN
Set-NetAdapterAdvancedProperty -Name "Ethernet" -DisplayName "Priority & VLAN" -DisplayValue "Priority & VLAN Disabled"
Disable Receive Segment Coalescing (IPv4)
Set-NetAdapterAdvancedProperty -Name "Ethernet" -DisplayName "Recv Segment Coalescing (IPv4)" -DisplayValue "Disabled"
I also recommend running the below to disable RSC globally.
netsh int tcp set global rsc=disabled
Disable Receive Segment Coalescing (IPv6)
Set-NetAdapterAdvancedProperty -Name "Ethernet" -DisplayName "Recv Segment Coalescing (IPv6)" -DisplayValue "Disabled"
Disable Wake on Magic Packet
Set-NetAdapterAdvancedProperty -Name "Ethernet" -DisplayName "Wake on Magic Packet" -DisplayValue "Disabled"
Disable Wake on pattern match
Set-NetAdapterAdvancedProperty -Name "Ethernet" -DisplayName "Wake on pattern match" -DisplayValue "Disabled"
Disable Advanced Energy Efficient Ethernet
Set-NetAdapterAdvancedProperty -Name "Ethernet" -DisplayName "Advanced EEE" -DisplayValue "Disabled"
Disable Green Ethernet
Set-NetAdapterAdvancedProperty -Name "Ethernet" -DisplayName "Green Ethernet" -DisplayValue "Disabled"
Disable Gigabit Lite
Set-NetAdapterAdvancedProperty -Name "Ethernet" -DisplayName "Gigabit Lite" -DisplayValue "Disabled"
Disable Power Saving Mode
Set-NetAdapterAdvancedProperty -Name "Ethernet" -DisplayName "Power Saving Mode" -DisplayValue "Disabled"
I know the way I have written the above means your can't copy the lot and paste it in one go in PowerShell, please go here if you wish for a copy / paste friendly version.
Unbind unnecessary network services / protocols
By default Windows will bind certain services / protocols to your network adapter such as Client for Microsoft Windows, File and Printer Sharing for Microsoft Networks, TCP/IPv6 and a few more. If your PC is a standalone not part of any network you can unbind unnecessary network services to remove any overhead associated with these. To play games online and browse the internet all you need is Internet Protocol Version 4 TCP/IPv4 (unless your ISP supports IPv6 support) bound to your network adapter, as illustrated below.

In the start menu search for 'View Network Connections' then right click on your network adapter and click on 'Properties'. Untick everything but Internet Protocol Version 4 TCP/IPv4 unless you are using TCP/IPv6 or other services.
These next settings will require using the Registry Editor.
Change TCP Acknowledgment (ACK) behaviour to 1
You can read more about TcpAckFrequency here, by editing your Windows registry settings you can change this from the default of 2 to 1.
Type 'regedit' in the start menu and open the Registry Editor. Browse to the following location,
HKEY_LOCAL_MACHINE\SYSTEM\CurrentControlSet\Services\Tcpip\Parameters\Interfaces\
Find the folder that contains your network adapter, create a new DWORD (32 bit) Value called TcpAckFrequency and change its value to 1.
Change the System Responsiveness from 20% to 10%
By default Windows will reserve 20% of CPU resources for low priority tasks, when playing a game this setting will come into effect. The lowest value this can be set to is 10%.
You can use the SystemResponsiveness key in the registry to change this.
Browse to HKEY_LOCAL_MACHINE\SOFTWARE\Microsoft\Windows NT\CurrentVersion\Multimedia\SystemProfile
Change the SystemResponsiveness key to 10, decimal value.
Disable Network Throttling
By default Windows limits the processing of non multimedia network packets to 10 packets per millisecond. This limit can be disabled via the NetworkThrottleIndex registry key.
Browse to HKEY_LOCAL_MACHINE\SOFTWARE\Microsoft\Windows NT\CurrentVersion\Multimedia\SystemProfile
Change the NetworkThrottleIndex key to ffffffff, hexadecimal value.
Disable Prefetching and Super fetch
Windows is frequently analysing what apps and services you use the most often and caching portions of their code to disk so that their launch times are reduced. This is an ongoing process in Windows and whenever you load a game or app some form of caching will occur. On a modern SSD system speed isn't an issue and all the prefetching / super fetch does is create unnecessary overhead and IO read / writes. If you want the smoothest gaming experience possible I recommend disabling these.
Browse to Computer\HKEY_LOCAL_MACHINE\SYSTEM\CurrentControlSet\Control\Session Manager\Memory Management\PrefetchParameters
Set the EnablePrefetcher entry to 0
And in a command prompt with administrator access, type,
sc config SysMain start=disabled
This will disabled the superfetch service. Reboot your PC for these changes to take effect.
After rebooting your PC browse to your C:\Windows\Prefetch folder and delete all the *.pf files
Switch to an antivirus that does not hurt system performance
Unfortunately Windows Defender does have a big hit on system performance, https://www.av-comparatives.org has a good performance review (click the link), extremely worthy of note is the PC Mark test which shows Windows Defender having the worst performance impact of all anti virus software they tested. In my experience I have seen Windows Defender cause games to stutter and FPS not feel smooth, and despite adding those games to every exception in Windows Defender the issues remain unless you disable Windows Defender completely.
Based on the testing by AV Comparatives, their Performance Test October 2022 puts Panda Antivirus on the very top for minimal performance impact. They also have a free version which I am currently using. Give it a go and see what you think, available at https://www.pandasecurity.com/en/homeusers/free-antivirus/
Happy gaming!


Comments
Post a Comment
If you enjoyed this article please let me know!